The $400 Mistake I Made So You Don’t Have To
The first time I tried to hang a set of floating shelves, I had a bargain-bin tape measure, a wobbly handsaw, and a drill with a dying battery. Three hours later I had one crooked shelf, two ruined boards, and a hole in the wall that definitely wasn’t supposed to be there. I then spent $400 replacing the stuff I should have bought correctly the first time.
That’s the thing nobody says out loud about the best carpentry tools for home improvement: the expensive mistake usually isn’t buying a great tool. It’s buying five mediocre ones, then replacing them one by one. Home projects don’t fail because people lack talent. They fail because the tools can’t hold a line, cut square, or drive a screw without stripping it.
This guide is the one I wish I’d had. I’ll walk you through what to buy, in what order, what to skip, and where the money actually matters, whether you’re finishing a basement, building a deck, or just hanging that shelf properly.
[Note to editor: the first-person anecdotes throughout are written as author-voice placeholders. Replace them with the author’s genuine experiences before publishing.]
What Counts as “Best” in Carpentry Tools for Home Improvement?
“Best” is a slippery word in tool reviews. A $600 compound miter saw is the best tool for someone trimming out five rooms. For someone who’ll make four cuts a year, it’s a very expensive paperweight.
So here’s the definition I use: the best carpentry tools for home improvement are the ones that deliver accurate results, keep you safe, and get used often enough to justify what you paid. Everything below filters through those three tests.
Hand tools vs. power tools
New DIYers often assume power tools are the “real” tools and hand tools are the beginner stuff. It’s closer to the opposite. A good speed square, a sharp chisel, and a decent hand saw will solve problems a $300 power tool can’t.
Power tools are about speed and repeatability. Hand tools are about precision and control. A solid home improvement setup needs both, and the split matters. I’d put about 60% of a beginner’s budget into a handful of power tools and 40% into hand tools and measuring gear.
Cost per use
Here’s the framework I’d apply to every purchase. Divide the price by how many times you’ll realistically use the tool in the next five years. A $120 cordless drill used 200 times costs 60 cents per use. A $350 router used twice costs $175 per use, and that’s before you’ve learned how to use it.
Why the cordless era changes the math
Cordless tools used to be the compromise: weaker, shorter-lived, pricier. That’s mostly over. Brushless motors and better lithium-ion packs mean a modern 18V or 20V cordless drill or circular saw handles the vast majority of home projects. Corded tools still win for sustained heavy work, such as table saws and big routers, but for general carpentry, cordless is now the default I recommend.
Why Your Tool Choices Matter More Than You Think
Americans spend a staggering amount on home remodeling. Harvard’s Joint Center for Housing Studies has tracked annual improvement and maintenance spending well above the $400 billion mark in recent years. A big share of that is DIY and hybrid DIY work, which means millions of people are making tool decisions every year, and many of them are making expensive ones.
Accuracy, safety, and wasted material
A tape measure with a loose hook can throw a measurement off by 1/16 of an inch. That sounds trivial until you cut ten pieces of trim and none of them close up at the corners. Cheap tools introduce error at every step, and the errors compound.
Safety is the other half. Dull blades bind and kick back. Underpowered drills stall mid-hole and twist your wrist. Cheap clamps slip. In my experience, most shop accidents in home settings don’t come from exotic tools. They come from a dull blade, a wobbly workpiece, or a rushed cut.
The real cost of cheap tools
I’m not telling you to buy the most expensive tool on every shelf. Mid-range prosumer brands are the sweet spot for nearly everyone. But the rock-bottom tier has a hidden cost: every project takes longer, looks worse, and ends with frustration. People quit DIY because of tools that fight them.
[Internal Link: “how to plan a home renovation budget”]
The Best Carpentry Tools for Home Improvement, Step by Step
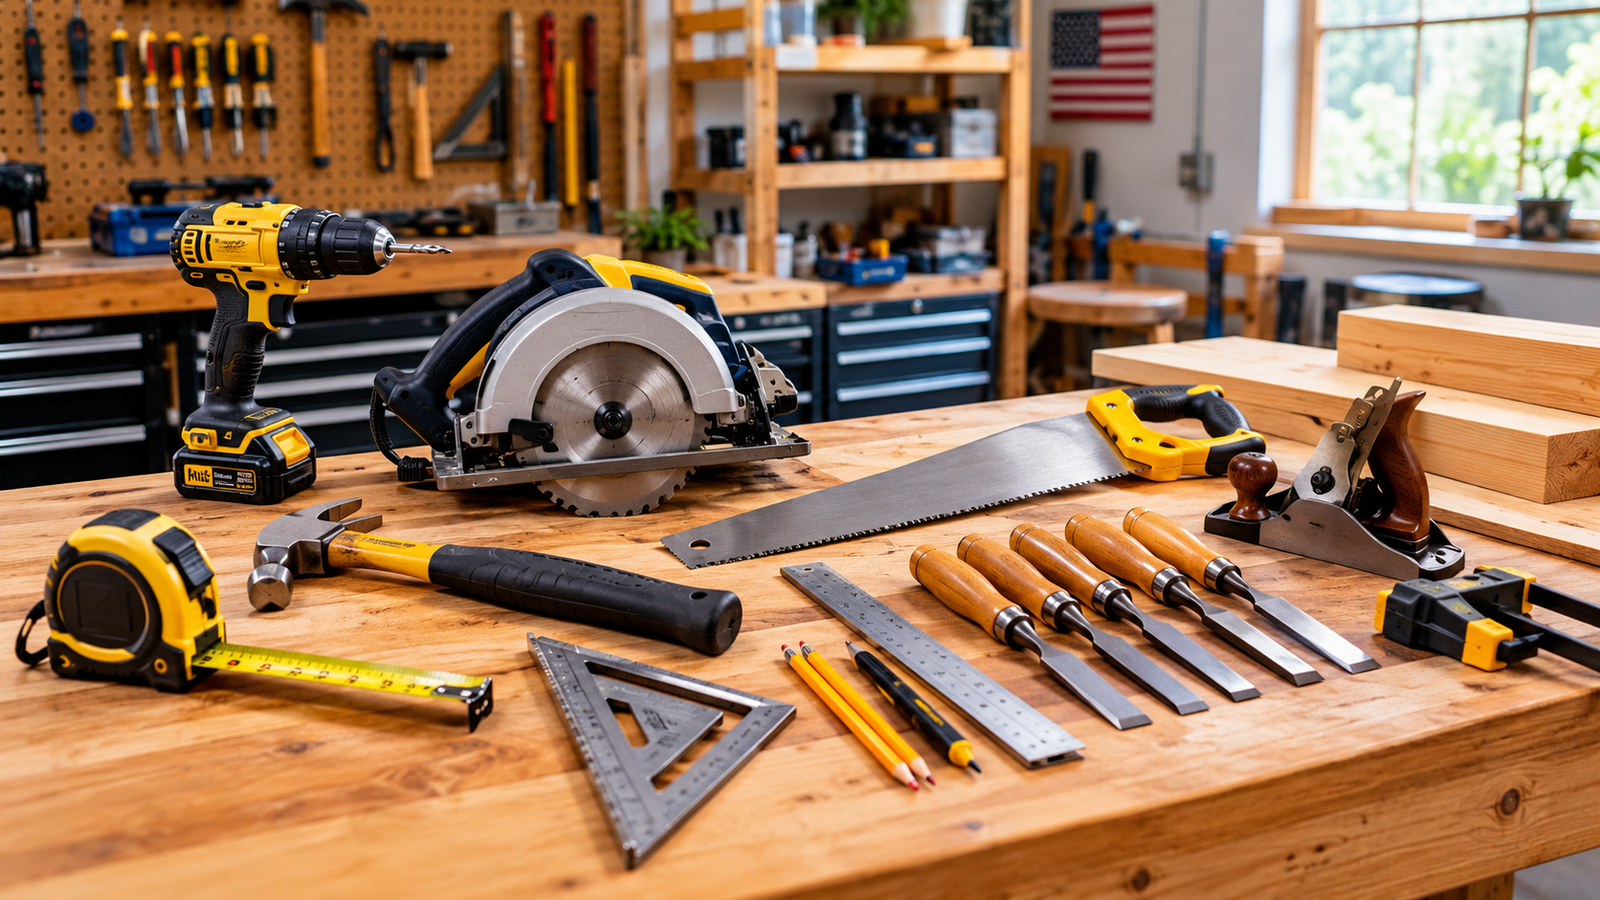
I think of a tool kit as four layers. Buy them in this order, and you’ll always have the right tool for the stage you’re at, without a garage full of regrets.
Layer 1: Measuring and marking (about $60–$100 total)
This is the cheapest layer and the most important. Every cut and every screw begins here.
- 25-foot tape measure ($15–$30). Get one with a wide, stiff blade and a hook that slides slightly, which is intentional and accounts for the thickness of the hook. Standout blade length matters; a stiff blade lets you measure across gaps alone.
- Speed square ($10–$15). A 7-inch rafter square is the most versatile carpentry tool per dollar I know. It marks 90- and 45-degree lines, guides a circular saw, and checks corners.
- Combination square ($20–$40). For marking parallel lines, checking depth, and verifying that edges are truly square.
- Level, 24-inch plus a torpedo ($25–$45). A 24-inch level handles shelves and door frames. A small torpedo level fits tight spots.
- Pencils and a marking knife. A sharp carpenter’s pencil is fine for rough work. A marking knife gives a razor-fine line for joinery and trim, where a pencil’s thickness is itself an error.
Pro opinion: Don’t cheap out here. A $9 square that isn’t actually square will make every project wrong in the same direction.
Layer 2: Cutting (about $200–$500)
Cutting is where most of your budget and most of your risk live. Here’s how I’d prioritize.
1. Circular saw (corded or cordless, $60–$200). If I could own only one saw, this is it. It breaks down sheet goods, crosscuts lumber, and handles most framing and rough work. Pair it with a speed square or a clamped straightedge and you can make surprisingly accurate cuts.
2. Jigsaw ($50–$150). For curves, cutouts, and notches: sink openings, outlet boxes, scrollwork. It’s not a precision saw, but it’s the right answer for irregular shapes.
3. Hand saw ($15–$40). A Japanese pull saw (a ryoba or dozuki) cuts on the pull stroke with a thin kerf and clean results. For trimming a door, flush-cutting a dowel, or cutting a small piece, it beats hauling out a power saw.
4. Compound miter saw ($150–$600). This is the upgrade that transforms trim, baseboards, crown molding, and deck framing. It’s not the first purchase, but if your plans include any finish carpentry, buy it second. A 10-inch model handles most home projects; a 12-inch handles wider stock.
5. Table saw (later, if ever). Table saws are powerful and genuinely dangerous. For a first-year DIYer, I’d skip one. A circular saw plus a good guide, or a track saw down the road, covers most needs with less risk and less floor space.
Layer 3: Drilling and fastening (about $150–$350)
Cordless drill/driver ($80–$200). This will be your most-used tool, so it’s where I’d spend a little extra. Look for a brushless motor, a 1/2-inch chuck, an adjustable clutch, and two batteries. The clutch matters more than people realize: it stops the drill from over-driving screws and chewing up wood.
Impact driver ($80–$170). Many people buy a drill and an impact driver as a combo, and I think that’s right. The impact driver sinks long screws effortlessly and saves your wrist. The drill handles holes and delicate work. Together they’re the backbone of an 18V/20V kit.
Hammer ($15–$30). A 16-ounce curved-claw framing or finish hammer is plenty. Don’t overlook a nail set and a small pry bar for finish work.
Bit and driver sets ($20–$50). Quality bits matter more than quantity. Get a good set of twist bits, a few spade or Forstner bits, and decent driver bits. Cheap bits strip heads and dull fast.
Layer 4: Shaping, clamping, and finishing (about $100–$300)
Clamps (start with 4–6, $40–$100). You can never have enough clamps. Bar clamps and F-clamps hold glue-ups and keep workpieces from moving while you cut. Pipe clamps and quick-grip styles round out a starter set. I mention clamps constantly because they’re the thing beginners most often skip.
Chisel set ($25–$60). Three or four bevel-edge chisels (1/4″, 1/2″, 3/4″, 1″) handle hinge mortises, cleaning out joints, and fitting trim. A chisel is only as good as its edge, so budget for a sharpening stone.
Block plane ($30–$80). For easing edges, trimming doors, and fitting parts. It’s the carpentry tool people forget about and then can’t live without.
Random orbital sander ($50–$120). A 5-inch sander speeds up finishing dramatically. Pair it with a dust collection method; fine wood dust is a respiratory hazard.
Safety gear ($40–$100). Safety glasses, hearing protection, a dust mask or respirator, and work gloves where appropriate. Not optional.
[Internal Link: “how to sharpen chisels and plane blades”]
Common Mistakes People Make (and How to Avoid Them)
I’ve made most of these myself. A few I made twice.
Mistake 1: Buying a giant “all-in-one” tool kit
Those 200-piece kits look like a bargain. They usually contain 20 tools you’ll use, 180 you won’t, and a hammer that bends. You’re better off buying individual tools from reputable brands and building up over time. A 5-piece kit of good tools beats a 200-piece kit of bad ones every time.
Mistake 2: Ignoring battery platforms
Cordless tools aren’t just tools; they’re an ecosystem. If you buy a drill from one brand, a saw from another, and a sander from a third, you’ll own three chargers and six batteries that don’t swap. Choose one 18V/20V platform and stay there. This one decision saves hundreds of dollars over a few years.
Mistake 3: Skipping clamps, then fighting the workpiece
If the board can move, the cut will be bad. A cut made against an unclamped board is a bad cut waiting to happen. Clamp first, always.
Mistake 4: Dull blades and bits
A dull saw blade burns, binds, and tears. A dull drill bit wanders and overheats. Replacement blades are cheap compared to the cost of ruined lumber and the safety risk of forcing a dull tool. In my experience, the single biggest upgrade to a basic circular saw isn’t a new saw. It’s a fresh, quality blade.
Mistake 5: Measuring once
“Measure twice, cut once” is a cliché because it’s true. I’d add: mark with a square, not by eye, and cut on the waste side of your line so the pencil mark stays.
Mistake 6: Skipping safety gear
Eyes, ears, lungs. A moment of carelessness with a spinning blade or a flying chip can cost you permanently. Gear is cheap; medical bills and lost hearing aren’t.
[Internal Link: “workshop safety checklist for beginners”]
Expert Tips and Advanced Strategies
These are the things I’d tell a friend over a coffee, not a stranger in a comment section.
1. Buy the tool for the next project, not the next ten. Resist stockpiling. Start a project, identify the one tool that would make it dramatically easier, and buy that. Your collection will grow organically and every tool will have earned its place.
2. Rent before you buy for rarely used tools. Tile saws, floor sanders, large compressors, and demolition tools are perfect rental items. Hardware stores rent them by the day, often for a fraction of the purchase price.
3. Learn to sharpen. A sharp tool is a safer, more accurate tool. A basic sharpening setup (a couple of whetstones and a honing guide) costs under $60 and will make every chisel and plane in your kit better than a brand-new factory edge.
4. Upgrade your blade before your saw. A quality 24-tooth framing blade for rough work and a 40- or 60-tooth blade for finish cuts will improve a $70 circular saw more than $100 extra on the saw itself.
5. Invest in a good workbench or sturdy sawhorses. A stable work surface is a force multiplier. A pair of solid sawhorses and a sheet of plywood gets you 90% of the way to a workbench.
6. Use a straightedge guide with your circular saw. Clamp a straight board or a commercial guide to your workpiece and run the saw’s baseplate along it. You get cuts that rival a table saw for a fraction of the cost and risk.
7. Keep tools organized and accessible. A tool you can’t find is a tool you’ll replace. A simple pegboard or a stackable tool system pays for itself in saved time and saved duplicate purchases.
Comparison Table: Core Carpentry Tools at a Glance
| Tool | Best For | Typical Price | Skill Level | My Take |
|---|---|---|---|---|
| Cordless drill/driver | Drilling holes, driving screws | $80–$200 | Beginner | The single most-used tool in any home kit. Buy first. |
| Circular saw | Breaking down lumber and sheet goods | $60–$200 | Beginner–Intermediate | Best first saw. Pair with a quality blade and a guide. |
| Compound miter saw | Trim, baseboards, deck framing | $150–$600 | Intermediate | Buy second if you do finish work. Huge accuracy gain. |
| Jigsaw | Curves, cutouts, notches | $50–$150 | Beginner | A useful secondary saw, not a precision tool. |
| Random orbital sander | Smoothing and finishing | $50–$120 | Beginner | Saves hours. Always use dust control. |
| Chisel set | Hinge mortises, joint cleanup | $25–$60 | Intermediate | Cheap to start, but only works if you keep them sharp. |
| Table saw | Ripping, repeatable precision cuts | $300–$1,000+ | Advanced | Skip it for now. Powerful but unforgiving. |
Real Results: A Sample Project Walkthrough
Here’s an illustrative example of how this approach plays out in practice. Think of it as a composite based on common DIY experiences rather than a single measured study.
Imagine a homeowner who wants to build a wall of built-in shelves around a window: roughly 8 feet wide, with adjustable shelves, painted trim, and a face frame.
The starter kit:
- Cordless drill and impact driver combo
- Circular saw with a quality blade
- Speed square, tape measure, and 24-inch level
- A set of bar clamps
- A random orbital sander
- Safety glasses, ear protection, and a dust mask
The timeline, illustratively:
- Weekend 1: Measure, mark, and break down plywood with the circular saw and a clamped guide. Assemble the carcasses with pocket screws or glue and screws.
- Weekend 2: Install the units, level them, and attach the face frames. Sand everything.
- Weekend 3: Prime, paint, and finish.
What the tools did: The clamped guide made cuts clean enough to need minimal sanding. The impact driver sank screws without stripping. The level caught a floor that sloped nearly half an inch across the wall, which a shorter level would likely have missed.
The takeaway isn’t a magic number. It’s that a modest, well-chosen kit (well under $600 all-in) can produce results that look professionally built, as long as the basics are right: sharp blades, solid clamping, accurate measuring.
[Editor: replace this with a genuine author case study, with real costs, hours, and photos, to maximize EEAT.]
[Internal Link: “step-by-step guide to building built-in shelves”]
Who Should Follow This Approach (and Who Shouldn’t)
This guide is for you if:
- You’re a homeowner or renter planning shelves, trim, small furniture, or deck repairs
- You’re new to carpentry and want a practical roadmap
- You want to build a tool kit gradually without wasting money
- You value doing a job well, not just quickly
This guide is probably not for you if:
- You’re a professional contractor who needs job-site-grade, high-volume equipment
- You’re planning a major structural project (load-bearing walls, roofing, electrical, or plumbing), where permits, codes, and licensed professionals come into play
- You only need to hang one picture frame. A basic drill and a level will do, and you don’t need this whole list
I’d also add a caution: some jobs, like structural changes, gas, electrical, and major plumbing, aren’t worth doing alone, no matter how good your tools are. Knowing when to hire a pro is part of being a good DIYer.
Conclusion: Build Your Kit One Smart Purchase at a Time
If you remember nothing else, remember this: the best carpentry tools for home improvement aren’t the most expensive or the most numerous. They’re the ones that measure accurately, cut cleanly, drive fasteners reliably, and keep you safe. Start with measuring and marking tools, add a cordless drill/driver and a circular saw, then grow your kit project by project.
Choose one battery platform. Buy good blades and bits. Clamp everything. Learn to sharpen. And never skip the safety gear. Do those things and you’ll avoid the $400 mistake I made, and you’ll enjoy the work a lot more along the way.
So here’s my challenge: pick one project you’ve been putting off, whether it’s shelves, a gate, or new trim, and write down the three tools you’d need to do it right. Then go buy just those. Got a project in mind or a tool you swear by? Drop it in the comments. I read every one.
FAQ Section
1. What are the most essential carpentry tools for a beginner?
Start with a tape measure, speed square, level, cordless drill/driver, circular saw, hammer, and a few clamps. Add safety glasses, hearing protection, and a dust mask on day one. That core set handles most home projects, from shelves to basic framing. In my experience, beginners get the most value from the drill and the measuring tools, so don’t skimp on either. Add specialty tools like chisels, a jigsaw, or a miter saw only when a specific project demands them.
2. How much does a basic carpentry tool kit cost?
A solid starter kit typically runs $400–$800, depending on brands and whether you buy a drill and impact driver combo. Measuring tools cost about $60–$100, a drill and driver $150–$300, a circular saw $60–$200, and clamps and safety gear another $100 or so. You can start lower by buying used or sticking to essentials. I’d rather you spend $500 wisely than $200 on tools you’ll replace within a year.
3. Should I buy cordless or corded tools?
For most home improvement work, cordless is now the better choice. Modern brushless 18V/20V tools offer plenty of power, portability, and convenience, and one battery can run many tools. Corded tools still make sense for continuous heavy-duty use, like a large table saw or router. Personally, I use cordless for about 90% of my work and keep corded only where sustained power matters. Just pick one battery platform and stay with it.
4. What is the first power tool I should buy?
A cordless drill/driver. It drills holes and drives screws, which covers an enormous range of home tasks. Most people use theirs more than any other tool. Buy a brushless model with a good clutch and two batteries. Then add a circular saw as your first cutting tool. That two-tool combination covers a surprising amount of ground and gives you a foundation to build on.
5. Is a circular saw or a miter saw better for home projects?
It depends on the work. A circular saw is more versatile: it breaks down plywood, cuts lumber to length, and goes wherever the work is. A miter saw is better for repeatable, accurate crosscuts and angles, like trim, baseboards, and deck boards. If you can only buy one, I recommend the circular saw first. If your plans involve lots of finish carpentry, a miter saw is the natural second purchase.
6. Do I need a table saw for DIY carpentry?
Not at first, and for many people, not ever. Table saws are powerful, but they’re also among the most dangerous tools in a home shop and take up considerable space. A circular saw with a straightedge guide, or a track saw, handles most ripping and sheet-good cuts safely. In my opinion, a beginner should master simpler saws before considering a table saw, and should take proper safety training if they do buy one.
7. How do I choose a good tape measure?
Look for a 25-foot length, a wide, stiff blade that can extend several feet without collapsing, clear markings, and a hook that moves slightly to account for its own thickness. A sturdy case and a reliable lock help too. The blade standout matters more than people think, since it lets you measure alone across gaps. A good tape costs $15–$30, and it’s one of the best-value tools in your kit.
8. How should I maintain my carpentry tools?
Keep blades and bits sharp, wipe metal surfaces clean and dry to prevent rust, store tools in a dry place, and recharge batteries according to the manufacturer’s guidance. Sharpen chisels and plane irons regularly, and replace saw blades when they burn or bind. I’d also check cords, guards, and fasteners before each use. Well-maintained tools last longer, cut better, and are noticeably safer to use.
9. What safety gear do I need for carpentry?
At minimum: safety glasses, hearing protection, and a dust mask or respirator. Add work gloves for handling rough lumber (but not around spinning blades, where loose gloves can be a hazard), and sturdy closed-toe shoes. Fine wood dust and flying chips are real hazards even in small projects. In my experience, people who build the habit of putting gear on before touching a tool rarely regret it.
10. Is it worth buying used carpentry tools?
Often, yes, especially for hand tools, clamps, and older quality corded tools. Well-made vintage planes, chisels, and squares can outperform new budget versions. Be more cautious with used cordless tools, since batteries wear out and may be costly to replace. I always inspect used tools for damage, check that blades and guards work properly, and avoid anything with missing safety features.