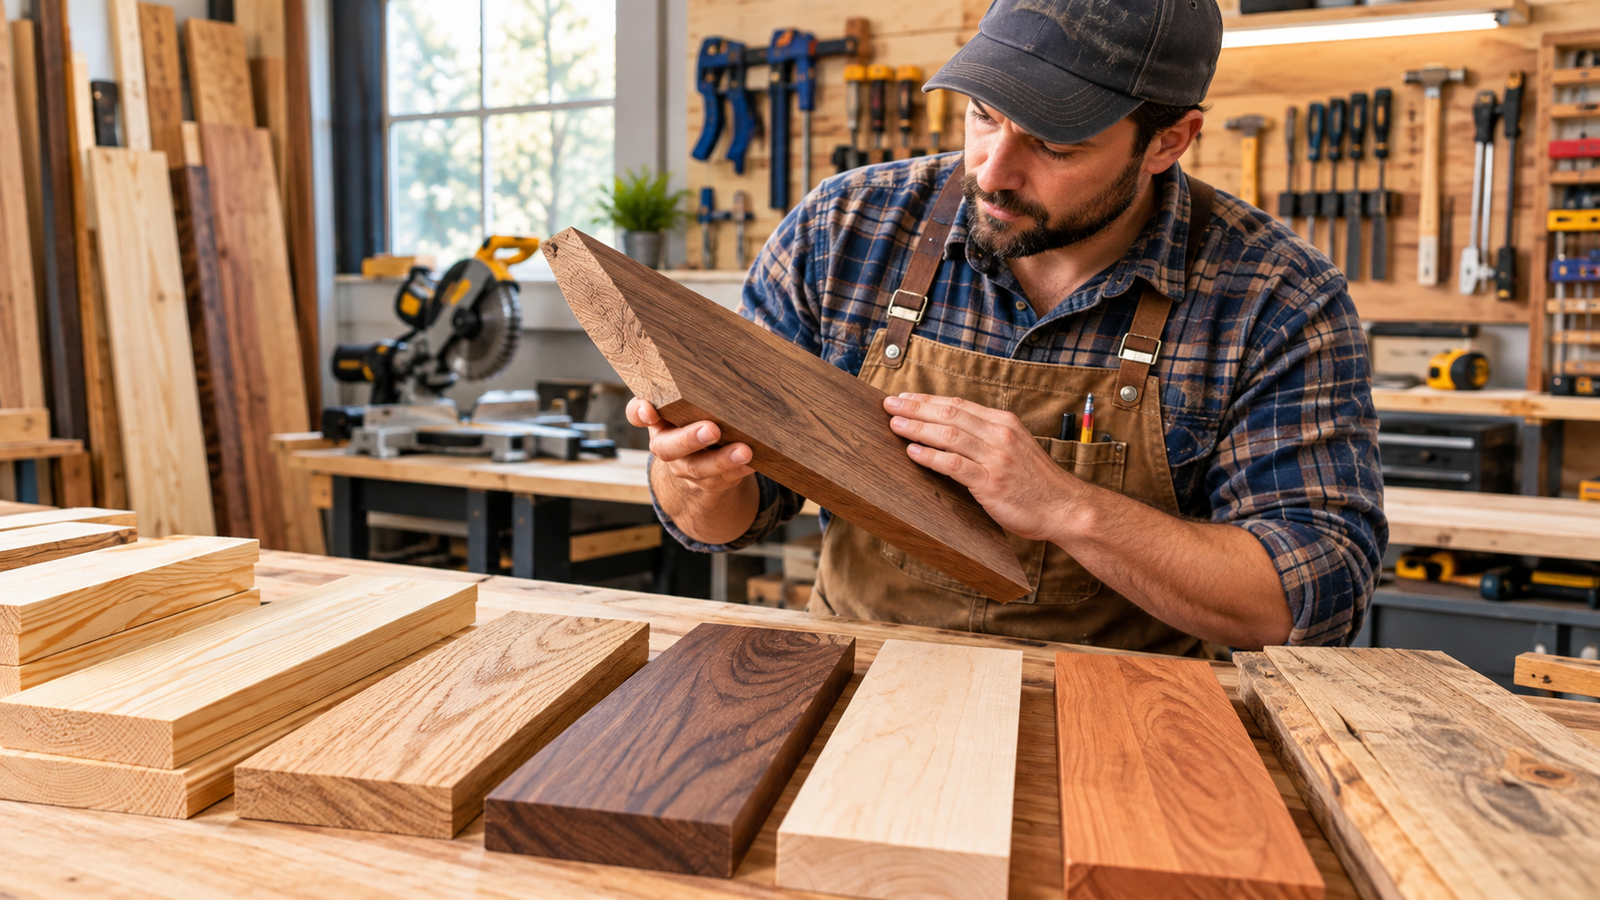
I built my first outdoor bench from beautiful, clear pine. It looked fantastic for one summer. By the second spring it was gray, cracked, and soft at the legs, and I was staring at a nearly new project headed for the curb.
The wood wasn’t bad. I’d just chosen it for the wrong job. That mistake taught me more than any tutorial, and it’s why I now treat how to choose the right wood for home projects as the first step of any build, not an afterthought at the lumberyard.
This guide gives you a repeatable method for picking wood. We’ll cover the types, the tradeoffs, the terms on the labels, and the errors that cost me money so they don’t cost you.
What “Choosing the Right Wood” Really Means
Most people shop by looks and price. That’s a start, but it leaves out the properties that decide whether a project lasts: hardness, stability, rot resistance, workability, and moisture content.
Hardwood vs. softwood (and why the names mislead)
Hardwood comes from deciduous trees, like oak, maple, walnut, and cherry. Softwood comes from conifers, like pine, fir, spruce, and cedar. That’s a botanical distinction, not a measure of how hard the wood actually is.
The names do mislead. Balsa is technically a hardwood and is famously soft. Some softwoods, like Douglas fir, are tougher than you’d expect.
A more useful measure is the Janka hardness scale, which rates how much force it takes to push a steel ball into the wood. These figures are approximate and vary by species and source, but they give you a feel:
- Eastern white pine: roughly 380
- Western red cedar: roughly 350
- Poplar: roughly 540
- Douglas fir: roughly 660
- Black walnut: roughly 1,000
- Cherry: roughly 950
- Red oak: roughly 1,290
- Hard maple: roughly 1,450
- Hickory: roughly 1,800
Higher numbers generally mean more dent resistance, but also harder cutting and more tool wear.
Solid wood vs. engineered panels
Solid wood is just that, a board cut from a tree. Engineered panels include plywood, MDF, and particleboard. They’re made by bonding layers, fibers, or chips together.
Neither is “better.” Solid wood is beautiful and repairable but moves with humidity. Plywood is stable and strong across wide surfaces but shows layered edges. MDF is smooth and cheap for painted work but hates water and holds screws poorly.
Choosing well means matching the material to the task, not defending a favorite.
[Internal Link: “Plywood grades explained: what the letters on the sheet mean”]
Why Your Wood Choice Matters More Than You Think
Wood is the one decision you can’t easily undo. Once you’ve cut, joined, and finished a piece, switching materials means starting over.
The cost of a wrong choice
Here’s what wrong choices look like in practice:
- Rot outdoors. Untreated pine or poplar in contact with soil or water can fail within a few seasons.
- Warping indoors. Wood that wasn’t dried or acclimated can cup, twist, or split after you’ve built with it.
- Dents and wear. A soft wood tabletop shows every dropped fork and set-down mug.
- Wasted effort. Dense hardwoods eat blades and demand sharp tools. Beginners often quit projects out of frustration with the material, not the design.
In my experience, a wood mistake is rarely dramatic. It’s a slow disappointment, a project that looks a little worse every month until you stop enjoying it.
The cost of overbuying
The opposite error is just as common. I’ve watched people buy premium walnut for a garage shelf that would have been fine in construction-grade lumber. You don’t need furniture-grade material for storage that nobody will see.
Spend where it shows or where strength matters. Save where it doesn’t.
Why it’s worth learning now
Lumber pricing and availability have swung noticeably in recent years, and product lines at big-box stores change. That makes it more valuable to understand why a species suits a job, so you can substitute intelligently when your first choice is out of stock or too expensive.
[Internal Link: “How to read a lumber label: grades, dimensions, and moisture ratings”]
How to Choose the Right Wood: A Step-by-Step Method
I use a simple framework I call Job, Place, Look, Cost. It keeps me from falling in love with a board before I know whether it fits.
Step 1: Define the Job (what is this wood going to do?)
Start with function. Ask:
- Will it carry weight (a shelf, a bench, a deck)?
- Will it be touched daily (a table, a handrail)?
- Is it decorative, or hidden?
- Will it be painted, stained, or left natural?
A shelf that holds heavy books needs stiffness, so thicker boards or denser wood. A painted cabinet box can be plywood. A cutting board needs a hard, tight-grained, food-safe species.
Writing the job down in one sentence sounds silly, but it prevents most bad purchases.
Step 2: Define the Place (indoors, outdoors, or somewhere in between)
Environment is the biggest filter.
Indoor, dry spaces: Almost any species works. Choose based on appearance, hardness, and budget.
Humid spaces (bathrooms, basements, kitchens): Pick stable species and finish every surface, including undersides and edges. Avoid MDF near water.
Outdoor, above ground: You want natural rot resistance or treatment. Good natural options include cedar, redwood, and cypress, where available. Pressure-treated lumber is a common budget choice for structural parts.
Outdoor, ground contact: This is the harshest condition. Use lumber rated for ground contact, and be careful, because “treated” isn’t a single category. Treatment levels differ, and the label tells you where the wood is rated to be used.
Step 3: Match the Properties to the Job
Now narrow down by the traits that matter.
Hardness. Harder wood resists dents and wear, which matters for tabletops, floors, and workbenches. Softer wood is easier to cut, nail, and shape, which matters for beginners and for hidden structure.
Stability. Some woods move more than others as humidity changes. Quartersawn boards are generally more stable than flatsawn. Plywood is dimensionally steady across large panels, which is why it’s a favorite for cabinets and shelves.
Grain and figure. Open-grained woods like oak can look rough under paint unless you fill the pores. Tight-grained woods like maple and poplar give smoother painted surfaces. Strong grain patterns suit natural or stained finishes.
Workability. Pine and poplar cut easily. Oak and maple take sharper tools and more patience. Some woods, like cherry and maple, can burn or blotch under certain tools and stains.
Stain behavior. Pine and maple are notorious for blotchy stain unless you use a pre-stain conditioner or gel stain. Oak and ash take stain evenly.
[Internal Link: “How to stain pine and maple without blotching”]
Step 4: Check Grade, Moisture, and Defects
At the lumberyard, look at every board. Don’t just grab the top of the pile.
- Sight down the edge like you’re aiming a rifle. Reject bows, twists, and cups.
- Check the ends for splits and checks.
- Look for knots in places that matter. Large loose knots can fall out or weaken a board.
- Ask about moisture. Kiln-dried lumber is typically better for indoor furniture and cabinetry. Construction lumber can be wetter and may shrink or twist as it dries in your home.
- Let it acclimate. Stack boards with spacers in the room where they’ll live for several days before cutting.
If a moisture meter is in your budget, it’s one of the most useful tools you can own. As a rough guide, interior furniture lumber is commonly targeted somewhere in the single digits to low teens percent moisture content, though recommendations vary by region and climate.
Step 5: Weigh Cost Against Value
Price per board foot is only part of the story. Count waste, tool wear, finishing effort, and how long the project will last.
A cheap board that warps costs more than a good one that doesn’t. And an expensive board used where nobody sees it is simply money wasted.
My rule is to spend premium money on visible, handled surfaces and use economical material for structure and hidden parts.
Matching Wood to Common Home Projects
Here’s how I’d apply the method to projects people ask about most.
Shelving and storage
For utility shelves, construction-grade pine or fir, or plywood, works fine. For visible bookshelves, consider poplar (paint) or oak, maple, or ash (natural). Shelves sag over long spans, so use thicker material or add a front edge strip to stiffen them.
Furniture (tables, desks, chairs)
For tabletops, harder species like oak, maple, ash, and walnut resist everyday wear. Pine can work for rustic styles if you accept that it will dent and show character.
For chairs and legs, you want strong, tight-grained wood with good shear resistance. Hardwoods are the common choice.
Painted cabinets and built-ins
Plywood boxes with solid wood face frames are a classic combination. Use maple or poplar for painted frames because their tighter grain gives a smoother finish. Birch plywood is a popular choice for clean edges.
Outdoor furniture and planters
Cedar and redwood are well known for natural rot resistance and light weight. Teak is famous for outdoor durability but is expensive. For budget builds, pressure-treated lumber works for structure, but check the manufacturer’s guidance before using it where food or skin contact is likely.
Decks and fences
Decks usually involve either treated lumber, naturally durable softwoods, hardwood decking, or composite alternatives. Use the right fasteners for the material, since certain treatments corrode ordinary steel.
Cutting boards and kitchen items
Choose closed-grain hardwoods like maple, cherry, or walnut. Avoid open-pored woods, and use a food-safe finish like mineral oil or a board-specific conditioner.
Raised garden beds
Cedar is the common recommendation for longevity. Avoid wood treated with preservatives you can’t verify for edible gardens. When in doubt, read the product’s stated uses and follow them.
Workbenches and shop furniture
Here, mass and stiffness matter more than looks. Southern yellow pine, Douglas fir, and maple are common choices. A laminated plywood or MDF top can serve well and cost less.
[Internal Link: “Build a workbench for under a few hundred dollars”]
Common Mistakes (and How to Avoid Them)
I’ve made a depressing number of these.
Mistake 1: Using indoor wood outdoors
My bench is the classic example. Without natural durability or treatment, wood outdoors absorbs moisture, softens, and decays. If a project will see rain, choose material rated for it and finish it properly.
Mistake 2: Buying by looks at the store
Boards look different under warehouse lighting than in your living room. Bring a sample piece, or buy a small amount first and test a finish before committing to a whole project.
Mistake 3: Ignoring wood movement
Wood expands and contracts across its width with humidity. A solid tabletop glued tightly to a rigid frame can split. Allow movement with slotted holes, tabletop fasteners, or breadboard-style details.
Mistake 4: Skipping acclimation
I once cut and assembled a cabinet from lumber fresh off a truck. Within weeks, the joints opened. Let boards sit in your space first.
Mistake 5: Treating “pressure-treated” as one thing
Different treatments suit different exposures. Some are only for above-ground use. Read the tag, and use proper fasteners. Wear gloves and a dust mask when cutting, and follow the manufacturer’s disposal guidance, since you should not burn treated scraps.
Mistake 6: Choosing hardwood for everything
Hardwood isn’t automatically better. It’s harder to work, harder on tools, and often unnecessary. A hardwood shelf in a garage is overkill.
Mistake 7: Forgetting the finish
Wood choice and finish go together. A beautiful species can look terrible under the wrong stain, and a plain species can look great with the right one. Always test on scrap from the same board.
Mistake 8: Buying exactly what you need
You’ll make mistakes. Buy 10 to 15 percent extra to cover waste, bad boards, and cutting errors. It beats a second trip, and the extra often matches the grain and color of the first batch.
[Internal Link: “Cut list and waste planning: how much lumber to buy”]
Expert Tips & Advanced Strategies
These are the things I’d tell a friend who’s past the basics.
1. Learn to read grain. Flatsawn boards show cathedral patterns and tend to cup. Quartersawn boards show straighter lines and are more stable, but cost more. Know which you’re holding.
2. Choose your boards, not just your species. Within one pile of the same wood, quality varies wildly. Spending ten extra minutes picking straight, clear boards saves hours of fixing later.
3. Use plywood where it shines. Cabinet boxes, shelves, and large flat panels are plywood’s home turf. Veneer-faced plywood with solid wood edging looks high-end and resists movement.
4. Mix species deliberately. Hardwood where it’s seen and touched, softwood for hidden structure. A solid oak front on a pine carcass is a classic cost-saver.
5. Buy kiln-dried for interior furniture. If lumber is sold as construction grade, plan for extra drying time or choose a better product for fine work.
6. Consider sustainability and sourcing. Look for responsibly sourced lumber where available, such as certified products. It’s also worth knowing that some imported species face trade restrictions, so ask your supplier about origin.
7. Keep a “scrap library.” I save offcuts from every project and label them. When I plan a future build, I test stains and finishes on known samples. It’s the closest thing I have to a cheat sheet.
8. Match fasteners and glue to the wood. Oily or resinous woods can resist some glues. Acidic woods like oak can stain or react around certain metals when wet. Check compatibility, especially outdoors.
Real Results & Case Studies
(Illustrative composite. Replace with your own project data.)
Picture a homeowner who wanted three things in one season: a set of garage shelves, a dining table, and outdoor planters.
Their first instinct was to buy one wood for everything. Oak looked appealing, and they liked the idea of a consistent look.
Instead, they used the Job, Place, Look, Cost method:
| Project | Wood chosen | Reason |
|---|---|---|
| Garage shelves | Construction-grade fir and plywood | Hidden, utilitarian, budget-friendly, adequate strength |
| Dining table | Hard maple top over a poplar base (painted) | Dent resistance where it’s handled, savings where it’s painted |
| Outdoor planters | Cedar | Natural rot resistance and light weight |
The shelves cost a fraction of what oak would have. The table top held up well to daily use, and the painted base looked clean and smooth. The planters weathered a full year outdoors with only a light sealant.
The owner estimated they saved a meaningful amount compared to the all-oak plan, and, more importantly, nothing failed. The projects were built to suit their jobs, so they kept working.
Who Should Use This Approach (and Who Can Skip It)
This method is for you if:
- You’re planning a first or second woodworking project
- You’ve had wood warp, split, or rot on a previous build
- You’re working on a budget and need to spend wisely
- You’re building something for outdoor or humid conditions
You can simplify if:
- You’re making a quick, disposable project, like a jig or a temporary shelf
- You’re working under a plan that specifies the exact material and grade
- You’re hiring a professional who will specify materials for you
A few cautions
Structural projects, like decks, load-bearing beams, and stair parts, are governed by building codes and engineering requirements. Don’t guess at species or grade there. Check local codes, and consult a professional when safety is involved.
I’m a writer sharing practical experience, not an engineer or building inspector, so treat this as a starting framework and verify specifics for your project.
Conclusion
After a lot of warped boards and one very sad bench, here’s my takeaway. Learning how to choose the right wood for home projects isn’t about memorizing species. It’s about asking four questions: What’s the job? Where will it live? How should it look? What does it cost?
Match hardness to wear, stability to humidity, durability to exposure, and budget to visibility. Pick your boards by hand, let them acclimate, and test your finish before committing.
Do that and you’ll stop second-guessing at the lumberyard and start building things that last.
Here’s my challenge: before your next project, write one sentence describing its job and its location, then choose the wood from that sentence alone. Tell me in the comments what you’re building, and I’ll suggest what I’d buy.
4. Comparison Table
Hardness values are approximate Janka figures, and prices are relative rather than exact. Costs vary a lot by region.
| Wood | Approx. Hardness | Outdoor Durability | Ease of Working | Relative Cost | Best For |
|---|---|---|---|---|---|
| Pine (white/yellow) | Low (~380 to 700+) | Low unless treated | Easy | Low | Shelves, rustic furniture, framing, painted projects |
| Poplar | Low to medium (~540) | Low | Easy | Low to moderate | Painted cabinets, drawer parts, hidden structure |
| Cedar | Low (~350) | High (natural resistance) | Easy | Moderate | Outdoor furniture, planters, fences |
| Oak (red/white) | High (~1,290 to 1,360) | Moderate (white oak better) | Moderate | Moderate to high | Tables, cabinets, flooring, stained furniture |
| Hard maple | Very high (~1,450) | Low | Hard | Moderate to high | Cutting boards, workbench tops, painted furniture |
| Walnut | Medium to high (~1,000) | Low to moderate | Moderate | High | Fine furniture, accents |
| Plywood (birch/hardwood) | Varies by face/core | Low unless exterior-rated | Easy to moderate | Moderate | Cabinets, shelves, large flat panels |
| Pressure-treated lumber | Varies (often pine) | High (check rating) | Moderate | Low to moderate | Decks, fences, ground-contact structure |
5. FAQ Section
1. What is the best wood for beginners?
Pine and poplar are the most forgiving choices. They’re soft, affordable, and easy to cut, sand, and fasten, which lets you focus on technique instead of fighting the material. Poplar is great for painted projects, while pine suits rustic or utility builds. In my experience, starting with inexpensive wood is smart, because your first projects will include mistakes. Move up to oak or maple once your cuts and joints are consistently clean and you’re comfortable sharpening tools.
2. What is the difference between hardwood and softwood?
The difference is botanical, not about actual hardness. Hardwoods come from deciduous trees such as oak, maple, and walnut. Softwoods come from conifers like pine, fir, and cedar. Many hardwoods are harder, but there are exceptions, like balsa, which is a very soft hardwood. A better measure of toughness is the Janka hardness rating. Choose based on the job: dent resistance, appearance, workability, and cost matter more than the label.
3. What wood should I use for outdoor furniture?
Cedar, redwood, cypress, and teak are popular because they have natural resistance to rot and insects. Cedar and redwood are lighter and easier to work, while teak is very durable but expensive. Pressure-treated lumber is a budget option, though I’d check the tag and use it mainly for structure. Whatever you choose, use exterior-rated fasteners and a protective finish. In my own tests, even durable wood lasts longer when end grain is sealed and water can drain away.
4. Is pine good for furniture?
Yes, with realistic expectations. Pine is affordable and easy to work, and it looks good in rustic or painted pieces. It’s also soft, so it dents and scratches more easily than oak or maple. It can also stain blotchy unless you use a conditioner or gel stain. I like pine for bookcases, benches, and kids’ furniture where a worn look is acceptable. For a heavily used dining table, I’d choose a harder species.
5. Is plywood better than solid wood?
Neither is universally better. Plywood is stable, strong across wide panels, and economical for cabinets, shelves, and large flat surfaces. Solid wood looks and feels more traditional, can be shaped and repaired more easily, and works well for legs, frames, and edges. Many of the best projects combine both: plywood for panels and solid wood for edging and faces. I use plywood for boxes and solid wood wherever hands or eyes will land.
6. What is the cheapest wood for DIY projects?
Construction-grade pine, fir, and spruce are typically the cheapest, along with basic plywood and MDF. They’re fine for shelves, workbenches, framing, and painted projects. They can have knots, wetter moisture content, and more warping, so pick boards carefully and let them dry. I think the cheapest wood isn’t always the best value: a slightly better board that stays straight can save time and frustration. Spend money on boards that will be seen or touched.
7. How do I stop wood from warping?
Start with properly dried lumber and let it acclimate in your space for several days before cutting. Store boards flat with spacers for airflow. Seal all sides of a project evenly with finish, because uneven moisture exchange causes cupping. Allow for seasonal movement in wide panels and tabletops with proper joinery or fasteners. Choose more stable cuts, such as quartersawn, or use plywood for large flat areas. Most warping problems I’ve seen trace back to skipped acclimation.
8. Can I use pressure-treated wood for a garden bed?
Check the product’s labeling and the manufacturer’s guidance first. Modern residential treatments are generally different from older formulations, but products and recommendations vary. If you’re growing edible plants and have any doubt, cedar or another naturally durable wood is a simpler choice, and some people line the inside with a barrier. I personally lean toward cedar for vegetable beds because it removes the question. When in doubt, follow the instructions on the tag.
9. What wood is best for a cutting board?
Closed-grain hardwoods like hard maple, cherry, and walnut are standard choices. They’re dense enough to resist deep knife marks and don’t absorb liquids as readily as open-pored woods like oak. Avoid softwoods and oily or toxic exotic species. Finish with food-safe mineral oil or a dedicated board conditioner, and avoid soaking the board or running it through the dishwasher. I use maple for mine, and it has held up well to heavy daily use.
10. How much extra wood should I buy for a project?
A common guideline is to buy about 10 to 15 percent extra to cover waste, defects, and cutting errors. For complex projects or boards with lots of knots, you may want more. Extra material from the same batch also helps match grain and color, which can differ between lots. I always sketch a cut list first, arrange pieces on standard board lengths, and then add the cushion. A second trip to the lumberyard costs time and often means mismatched boards.