Author byline suggestion: written by [Your Name], [credential or years of experience].
My first real carpentry lesson came from a cut that was exactly 3/16 of an inch too short. [Author: replace with your own first-mistake story, with the specifics of what you built and what it cost.]
That tiny gap taught me what no tutorial had: basic carpentry skills aren’t about fancy tools or natural talent. They’re about a handful of small habits, repeated until they’re automatic. Measure carefully. Mark clearly. Cut on the right side of the line. Join with the right fastener. Finish with patience.
If you can do those five things, you can build shelves, benches, raised beds, and a surprising amount of furniture. If you can’t, even a $1,000 saw won’t save you.
This guide covers each skill in the order you’ll actually use it, the mistakes that cost beginners the most, and a realistic way to practice without wasting lumber.
What Are Basic Carpentry Skills?
Carpentry is the craft of cutting, shaping, and joining wood to build things that work. For a homeowner, “basic carpentry skills” means the core abilities that show up in nearly every project:
- Measuring, marking, and squaring
- Cutting (straight, square, and to a line)
- Drilling and fastening
- Joining (making two pieces stay together)
- Sanding and finishing
Everything else, from dovetails to staircase stringers, builds on these.
Carpentry vs. woodworking
The terms overlap, but here’s how I think about them. Carpentry leans structural and practical: framing, trim, shelving, decks. Woodworking leans toward furniture and fine detail. Beginners benefit from both, and the foundational skills are shared. You don’t need to pick a lane yet.
Why it’s easier to start now
The barrier to entry has dropped. Cordless tools are affordable and forgiving. Pocket-hole jigs give beginners strong joints without years of practice. Video tutorials let you watch a technique in slow motion. Home centers will even make rough cuts on sheet goods so you can fit plywood in your car.
You still have to practice. But you can get decent results in weeks, not years.
[Internal Link: “Best beginner woodworking tools under $300”]
Why Basic Carpentry Skills Matter for Homeowners
Money, safety, and confidence
Labor is the largest cost in most carpentry jobs. A contractor charging for built-ins, trim, or a deck is mostly charging for time and skill. Learn the basics and you can handle small to mid-sized jobs yourself, or at least judge whether a quote is reasonable.
Verify before publishing: If you cite a statistic on remodeling costs or DIY participation, pull it from a current source such as Harvard’s Joint Center for Housing Studies or the U.S. Census Bureau and link to it directly.
Safety is the other half. People who understand how saws kick back, how wood splits, and how clamps hold work are less likely to get hurt. Competence and caution grow together.
The skills transfer to everything
Squaring a bookcase uses the same logic as squaring a deck frame. Pre-drilling a hole in a shelf prevents the same splits you’d get in a fence board. Once the fundamentals click, each new project is mostly a new combination of familiar moves.
The Five-Skill Loop: Measure, Cut, Join, Smooth, Finish
I teach beginners a simple loop. Every project, from a planter box to a pantry, cycles through the same five steps. If something goes wrong, it usually went wrong in one of them. Find the step, fix the habit.
Skill 1: Measuring, marking, and squaring
Most carpentry errors start here, before any tool touches wood.
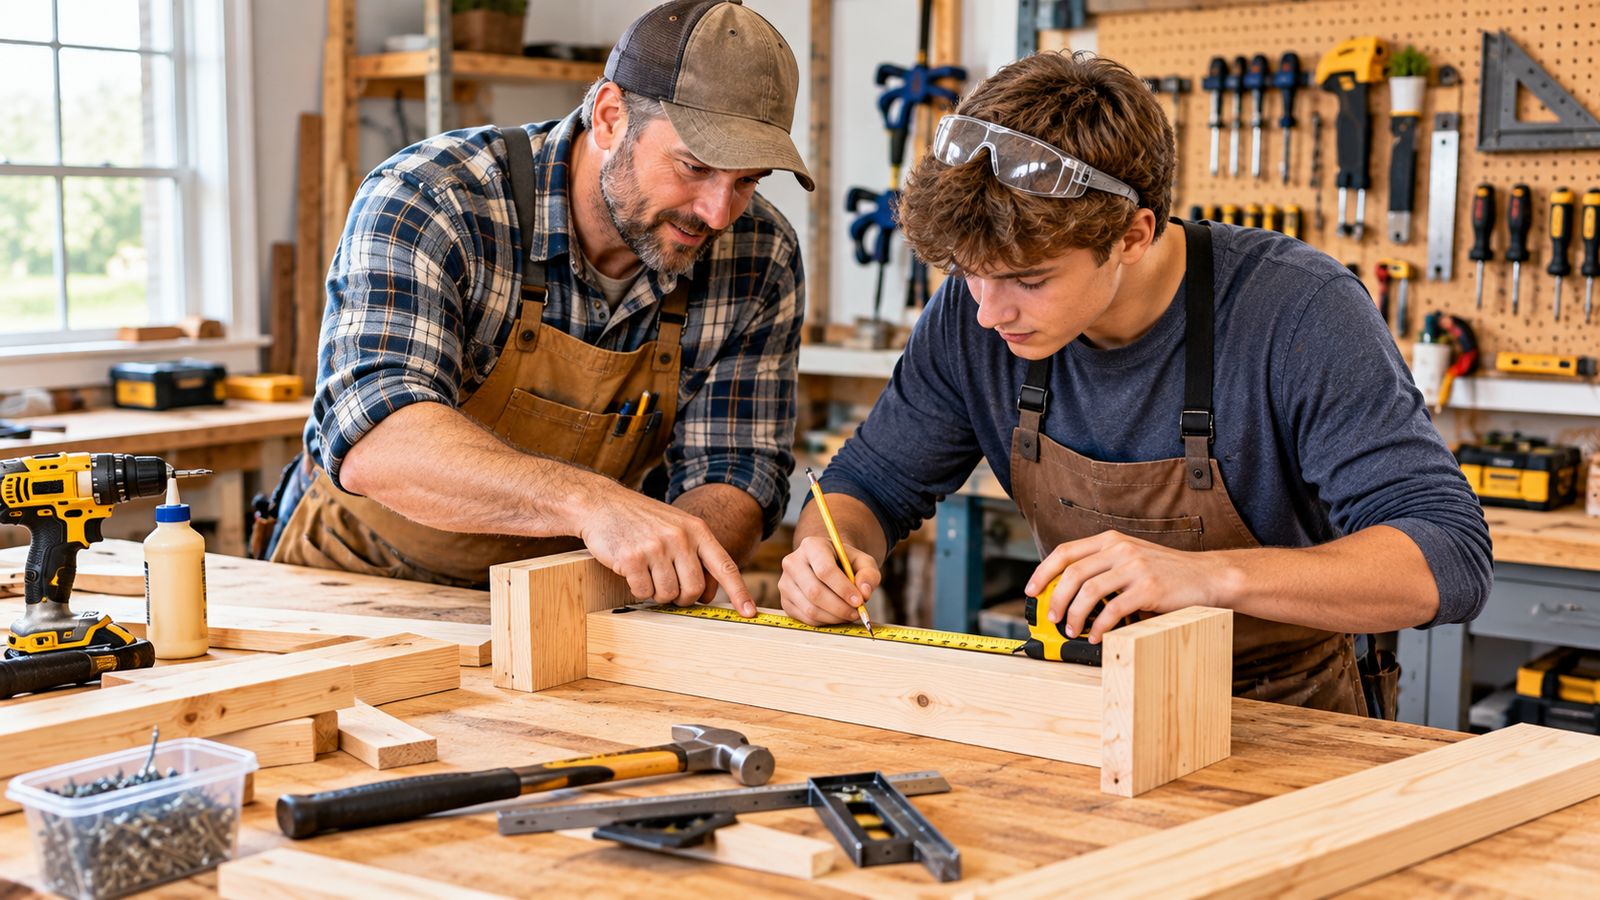
Use a tape measure properly.
The hook at the end of a tape slides slightly. That’s intentional. It compensates for the thickness of the hook itself, so inside and outside measurements both read true. Don’t “fix” it.
For precise work, many carpenters start at the 1-inch mark and subtract an inch, which avoids hook error entirely. Pick whichever method you like, but use the same one all project long.
Mark like you mean it.
Use a sharp pencil or a marking knife. A fat pencil line can be 1/16 inch wide, which is a meaningful error in fine work. Mark a small “V” at your measurement so the point of the V shows the exact spot. Then draw your line from the point using a square.
Use the right squares.
- Speed square: A triangle that guides circular saw cuts and marks 90 and 45 degrees. Cheap and indispensable.
- Combination square: Marks 90 and 45 degrees, sets repeatable depths, and checks edges.
- Framing square: A large L-shape for laying out bigger work and checking large assemblies.
Check for square.
A project that isn’t square won’t sit right, close right, or look right. Two reliable checks:
- The diagonal check: Measure corner to corner on both diagonals of a frame. If the measurements match, the frame is square. If not, nudge the long diagonal’s corners inward.
- The 3-4-5 method: For large layouts, measure 3 units along one edge and 4 along the other. If the distance between those points is 5, the corner is square.
Write it down.
Sketch the project and create a cut list. Label each piece. The cut list is the cheapest tool you’ll ever use.
[Internal Link: “How to build a cut list for any project”]
Skill 2: Cutting accurately
A good cut starts with a good setup. Supporting the wood properly, using the right blade, and positioning your body safely matter more than the saw brand.
Know the cuts.
- Crosscut: Across the grain. This is the most common cut.
- Rip cut: Along the grain.
- Miter cut: An angle across the face, usually 45 degrees for corners.
- Bevel cut: An angle through the thickness of the board.
Understand the kerf.
The blade removes material, called the kerf, which is roughly 1/8 inch on many standard blades. Cut on the waste side of your line so the piece you keep is the correct length. This is the single most common reason beginners end up with pieces slightly short.
Handsaw basics.
A good handsaw is worth owning even if you mostly use power tools. It’s quiet, cheap, and perfect for small trims.
- Start the cut with a few light backstrokes to establish the groove.
- Keep your index finger extended along the handle for guidance.
- Let the saw do the work. Pushing hard makes the blade wander.
Circular saw basics.
This is the workhorse for most homeowners. It’s also where most beginner injuries happen, so handle it with respect.
- Support both sides of the cut. The offcut shouldn’t fall or pinch the blade.
- Set depth. The blade should extend about 1/4 inch below the board.
- Clamp the work. Never hold it with your hand.
- Use a guide. A speed square or a clamped straightedge keeps the cut straight. The saw’s base plate sits offset from the blade, so measure that offset and account for it.
- Let the blade reach full speed before it touches the wood.
- Keep the cord out of the path, and keep your body out of the line of the blade in case of kickback.
Miter saw basics.
A miter saw makes fast, repeatable crosscuts. Use a stop block to cut several identical pieces without re-measuring each one. Hold the board firmly against the fence, and don’t reach across the blade.
Jigsaw basics.
Use it for curves and cutouts. Choose a blade matched to the material, and cut slowly in tight curves so the blade doesn’t bend.
Reduce tear-out.
Splintering at the exit of a cut ruins good faces. Put painter’s tape along the cut line, use a sharp blade with more teeth for fine work, and cut with the “good” face oriented correctly (circular saws splinter the top face; table saws and miter saws splinter the bottom).
Skill 3: Drilling, fastening, and basic joinery
A project is only as good as its connections.
Drilling basics.
- Pilot holes: A small hole where a screw will go prevents splitting, especially near board ends.
- Countersink: A shallow cone that lets the screw head sit flush or below the surface.
- Match the bit to the screw. The pilot hole should be about the diameter of the screw’s core (the shank without the threads).
- Use a depth stop or a piece of tape on the bit to avoid drilling through.
Choose the right fastener.
- Wood screws: Strong, removable, and adjustable.
- Finish nails and brad nails: Good for trim, with a nail gun or hammer and nail set.
- Construction or structural screws: For load-bearing connections.
- Exterior-rated or coated fasteners: Necessary outdoors. Ordinary screws will rust and stain the wood.
- Glue: Wood glue is often stronger than the wood fibers around it when applied correctly. Fasteners hold pieces in place while it cures.
Joinery for beginners.
You don’t need traditional joinery to build solid projects. Here are the ones to learn first:
- Butt joint: Two pieces meet end to face. Weak on its own, so reinforce with glue and screws or pocket holes.
- Pocket-hole joint: A jig drills an angled hole that lets you screw one piece into another invisibly. Fast and strong for cabinets, face frames, and tables.
- Dowel joint: Hardwood pins align and strengthen a joint. Good for edge-joining boards.
- Half-lap joint: Each piece is cut to half its thickness so they overlap flush. Stronger than a butt joint and a good step toward traditional joinery.
- Miter joint: Two angled ends form a corner, as in a picture frame. Looks clean but needs precision, and often needs splines or glue blocks for strength.
- Mortise and tenon: A peg-like tenon fits into a slot. The traditional standard for chairs and frames. Save this for later.
Clamping.
Good glue joints need pressure. Clamp so the joint closes without gaps, and wipe off squeeze-out. Beginners usually own too few clamps. I’d rather you buy four decent bar or pipe clamps than a drawer full of cheap ones.
[Internal Link: “Pocket-hole joinery: a step-by-step beginner’s guide”]
Skill 4: Smoothing and shaping
A well-sanded surface is the difference between “homemade” and “handmade.”
Sanding.
- Start with 80 or 120 grit to flatten and remove marks.
- Move to 180 or 220 for a smooth finish surface.
- Always sand with the grain. Cross-grain scratches show up under finish.
- Wipe dust off between grits so coarse particles don’t scratch the surface.
- For painted work, 150 to 180 is often enough. For stained work, go finer.
Ease the edges.
Sharp edges chip, splinter, and look unfinished. A light pass with sandpaper wrapped around a block softens the corner.
Planing and chiseling.
A block plane and a sharp chisel are worth learning eventually. They fix fit problems that sandpaper can’t. Keep the tools sharp, since a dull edge is more dangerous than a sharp one.
Filling.
Use wood filler for screw holes and small defects. Pick a filler that accepts stain if you’re staining. Sand it flush after it dries.
Skill 5: Finishing
Finishing protects the wood and defines how the project looks.
Choose a finish based on use.
- Paint: Prime first for even coverage and better adhesion.
- Stain plus clear coat: Shows the grain. Test the color on scrap, since the same stain looks different on pine and oak.
- Wipe-on polyurethane: Forgiving, thin coats, durable.
- Hardwax oil: Natural look and easy to repair.
- Exterior finishes: Choose products rated for outdoor use, and expect to reapply.
Prep matters.
Raw softwoods like pine can stain blotchy. A pre-stain wood conditioner helps even the color.
Thin coats beat thick coats.
Thick coats drip, bubble, and take forever to cure. Two or three light coats with a light sanding between them give a much better result.
Respect cure times.
A finish may be dry to the touch long before it’s fully hardened. Check the product label, and go easy on the piece for the recommended time.
[Internal Link: “How to stain wood without blotches”]
Common Mistakes (and How to Avoid Them)
I’d love to claim I avoided these. I didn’t. [Author: add one or two real mistakes you made, with details.]
Accuracy mistakes
1. Measuring once.
“Measure twice, cut once” is a cliché because it works. For repeated parts, mark one piece and transfer it to the others, rather than re-measuring each.
2. Ignoring the kerf.
Cut on the waste side. Always.
3. Mixing nominal and actual sizes.
A 2×4 is actually 1.5 by 3.5 inches. Plan with real dimensions. Measure your actual lumber before finalizing the cut list.
4. Trusting the store’s cuts.
Store cuts are fine for rough sizing, but they’re rarely precise enough for final fit. Cut oversized, then trim at home.
5. Not checking for square.
A small error at the first joint compounds through the whole assembly.
Tool and safety mistakes
6. Skipping safety gear.
Eye protection, hearing protection, and a dust mask aren’t optional. Noise-induced hearing loss is cumulative. Many power tools run loud enough to cause damage over time.
Verify before publishing: If you cite decibel levels or injury statistics, link to NIOSH, OSHA, or CPSC data.
7. Holding the work instead of clamping it.
Clamp the board. Your hands should stay away from the blade path.
8. Using dull blades and bits.
They burn, tear, and force you to push harder, which is when accidents happen.
9. Rushing glue-ups.
Glue sets quickly. Dry-fit first, gather clamps, and have a damp rag ready.
10. Ignoring lead paint.
If your home predates 1978, old paint may contain lead. Sanding or scraping can create hazardous dust. Review EPA lead-safe work guidance before disturbing painted trim.
11. Choosing the wrong wood.
Soft pine dents. Pressure-treated lumber isn’t suited for indoor furniture or food-contact surfaces. Ask a lumberyard employee if you’re unsure.
Expert Tips and Advanced Strategies
These are the habits that make people say, “How did you do that?”
1. Read the grain before you cut.
Grain direction affects how wood cuts, planes, sands, and splits. Planing against the grain tears the surface, and a cut across it can chip. Look at the boards before you decide which face shows.
2. Use a story stick.
Mark key dimensions on a scrap board and transfer them directly to your parts. It removes tape-reading errors.
3. Make a test cut on scrap.
Before cutting your good board, check the saw angle or depth on an offcut.
4. Always dry-fit.
Assemble without glue first. You’ll find the problems while they’re still free to fix.
5. Buy more lumber than the cut list requires.
Order 10 to 15 percent extra. Defects and mistakes are part of the process.
6. Learn to sharpen.
A sharp chisel and plane make fine adjustments easy. Dull tools make you think you’re bad at this.
7. Account for wood movement.
Wood expands and contracts with humidity, mostly across its width. Glue a wide solid panel rigidly into a frame and it may crack. Use floating panels or cleats that allow movement.
8. Build a good workbench early.
A flat, stable surface with clamping points improves every other skill on this list.
[Internal Link: “How to build a simple workbench in a weekend”]
4. Comparison Table
Prices are approximate and vary by retailer and region. Verify before publishing.
| Feature | Handsaw | Circular Saw | Miter Saw | Jigsaw |
|---|---|---|---|---|
| Main strength | Small, precise cuts; no power needed | Fast straight cuts on lumber and sheet goods | Repeatable crosscuts and angles | Curves and cutouts |
| Accuracy | High with practice | Good with a guide | Very good | Moderate |
| Portability | Excellent | Excellent | Limited | Excellent |
| Learning curve | Medium | Low to medium | Low | Low |
| Safety considerations | Lower risk, still sharp | Kickback risk; clamp the work | Keep hands clear of blade path | Blade can bind or break |
| Approx. price | $15 to $40 | $60 to $200 | $120 to $400+ | $50 to $150 |
| Best for | Trim, small fixes, quiet work | Framing, plywood, general building | Trim, frames, repeat cuts | Curves, notches, scroll shapes |
| Difficulty | Beginner | Beginner | Beginner | Beginner |
Real Results: A Realistic Learning Timeline and Case Study
Editor’s note: The scenario below is illustrative, not a documented personal result. Replace it with your own story and real numbers, or label it as hypothetical.
Consider a homeowner with no carpentry background who sets a goal: build a simple workbench, then a set of shelves.
Weeks 1 to 2: Measuring and cutting.
They buy a tape measure, speed square, pencil, clamps, and a circular saw. They practice cutting straight lines on cheap 2x4s, checking each cut with a square. By the end of week two, their cuts are consistently square.
Weeks 3 to 4: Fastening and joinery.
They learn pilot holes, countersinking, and pocket holes. They build the workbench, and the first attempt wobbles because the legs weren’t cut to equal length. They recut and re-assemble, learning why a stop block matters.
Weeks 5 to 6: Smoothing and finishing.
They build a set of garage shelves, sand thoroughly, and apply two coats of paint. The shelves look clean and hold a lot of weight.
What they gained: Roughly $250 to $400 in tools and materials, about 30 hours of practice, and a set of skills that applies to every project that follows. The workbench is the lasting win: it makes every later build easier.
The honest lesson is that the first project is practice. By the third, you stop fighting the tools and start planning the work.
Who Should (and Shouldn’t) Learn Carpentry Themselves
This is a good fit if you:
- Enjoy making things and accept imperfection while learning
- Have a small workspace, even a garage corner or driveway
- Want custom sizes that store-bought items can’t match
- Plan to do more than one project, so tools pay off over time
You might hire out or reconsider if you:
- Need guaranteed results fast with no room for error
- Are tackling structural work, load-bearing changes, or anything connected to electrical, plumbing, or gas
- Have physical limitations that make heavy materials or power tools unsafe
- Don’t enjoy the process and only want the outcome (a legitimate reason to hire a pro)
A hybrid works well. Pay a professional for structural or code-sensitive work, and handle the finish carpentry yourself.
Conclusion
Basic carpentry skills aren’t mysterious. They’re five habits: measure and mark precisely, cut on the waste side, fasten and join properly, smooth the surfaces, and finish with patience. Get those right and most beginner projects become straightforward.
My honest advice is to skip the temptation to buy every tool at once. Start with a tape, a speed square, a drill, a circular saw, a few clamps, and safety gear. Practice on cheap lumber. Build something you’ll use, like a workbench or a set of shelves. Let each mistake teach you something.
Pick one skill from this guide and practice it this week. Cut ten scrap boards square, or drill and countersink twenty pilot holes. Then leave a comment about where you got stuck. I read every one, and your question might shape the next guide.
[Internal Link: “DIY carpentry projects for American homeowners”]
5. FAQ Section
1. What are the basic skills of carpentry?
The core skills are measuring and marking, cutting accurately, drilling and fastening, joining pieces, sanding, and finishing. Squaring is the quiet sixth skill, since an out-of-square project never looks right. Master these and you can build shelves, benches, planters, and simple furniture. In my experience, measuring and marking cause more mistakes than any other step, so slow down there first. Everything else gets easier when your layout is accurate.
2. How do I learn carpentry at home?
Start with a few inexpensive tools and cheap lumber, then practice one skill at a time. Cut straight lines, drill pilot holes, and assemble small boxes. Follow beginner plans and watch reputable video tutorials, pausing to try each technique yourself. A local community class or maker space can add hands-on coaching. Don’t aim for perfect results at first. Build something small, notice what went wrong, and apply that to the next project.
3. What tools do I need to start carpentry?
A practical starter kit includes a tape measure, speed square, pencil, cordless drill/driver, circular saw, clamps, a random-orbit sander, and safety gear (glasses, hearing protection, dust mask). A pocket-hole jig is a smart early addition. Add a miter saw, block plane, and chisels as projects demand them. I’d avoid buying a table saw early. Many beginners get better results and stay safer with a good circular saw and a straightedge guide.
4. How do you cut a straight line with a circular saw?
Clamp a straightedge, such as a speed square, a level, or a factory-edge strip of plywood, to the board as a guide. Measure the offset between the blade and the edge of the saw’s base plate, and place the guide accordingly. Support both sides of the cut, set the blade depth about 1/4 inch below the board, let the blade reach full speed, and push steadily. Keep your body out of the blade’s line in case of kickback.
5. How long does it take to learn basic carpentry?
You can pick up the fundamentals in a few weeks of regular practice, such as a few hours on weekends. Becoming consistently accurate takes longer, usually a handful of completed projects. Fine woodworking and traditional joinery take years. Honestly, I think the first three builds teach more than any course, because you face real problems and solve them. Progress depends on how often you practice and how carefully you review your mistakes.
6. What is the easiest wood for beginners to work with?
Pine is cheap, widely available, and easy to cut and fasten, though it dents easily. Poplar is a step up: stable, affordable, and great for painted work. Plywood is ideal for shelves and cabinet boxes. Hardwoods like oak and maple are harder to cut and cost more, so I’d save them for later. For outdoor projects, use cedar or pressure-treated lumber rated for exterior use.
7. Why is my wood splitting when I screw into it?
Splitting usually happens when screws go in near an edge or end without a pilot hole. The screw acts as a wedge and forces the grain apart. Drill a pilot hole sized to the screw’s core, and keep screws away from board ends when possible. Hardwoods split more readily, so pilot holes matter even more. A countersink bit also relieves pressure around the screw head. If you’re still splitting, try a smaller screw or move the fastener inward.
8. What’s the difference between carpentry and woodworking?
Carpentry is generally structural and practical, covering framing, decks, trim, and built-ins. Woodworking usually focuses on furniture and fine details, including joinery and finishing. The lines blur, and many people do both. For a homeowner, I’d say the distinction matters less than the shared skills: accurate measuring, clean cuts, strong joints, and good finishing. Start with whatever project you actually want to use, and learn the specific techniques it requires.
9. Do I need a workshop to do carpentry?
No. Many people start with a garage corner, a basement bench, or even a driveway. You need a stable work surface, good light, ventilation for finishing, and enough room to move safely around materials. A workbench you build yourself becomes the center of a small space. Rolling carts and wall storage keep things organized. Dust and noise are the main practical concerns, so consider neighbors and ventilation before you start cutting.
10. Is carpentry safe for beginners?
Yes, with good habits. Wear eye and hearing protection, use sharp blades, clamp the workpiece, and keep hands out of the blade path. Don’t work when tired or rushed. Respect saws, since kickback and loose clothing cause many accidents. Review the manual for each tool, and learn techniques from reputable sources. If something feels unsafe, stop and rethink the setup. I also anchor any tall furniture I build to the wall to prevent tipping.