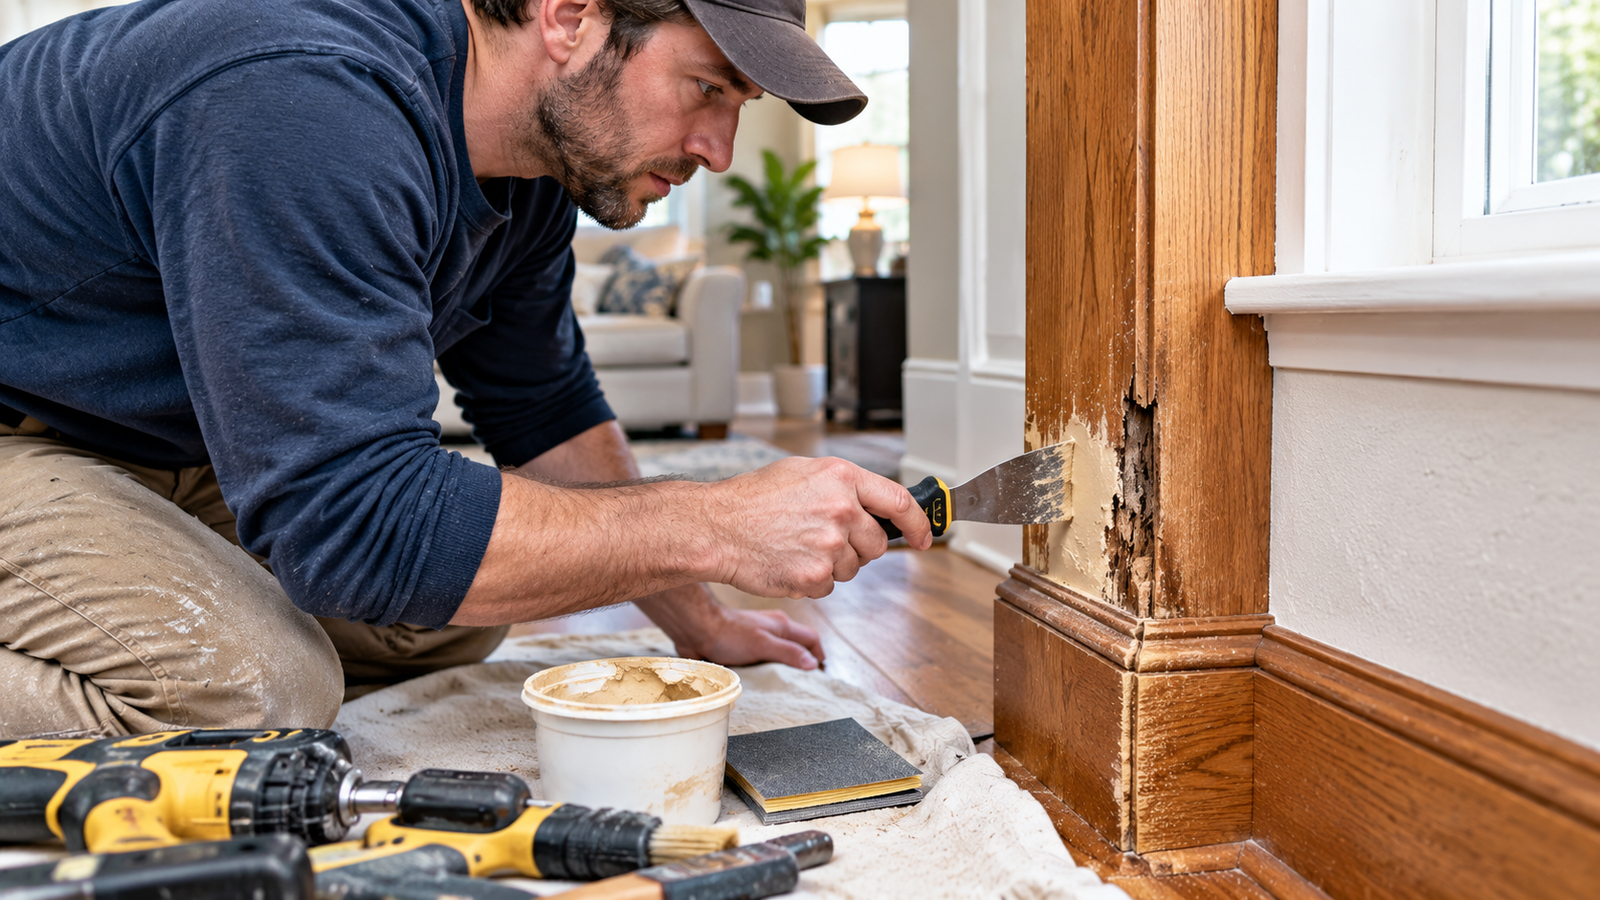
The Squeak That Taught Me to Look Underneath
For about two years I walked over the same squeaky hallway floorboard every morning and told myself I’d fix it “this weekend.” When I finally pulled up the carpet, the squeak wasn’t the real problem. A slow plumbing drip had been feeding moisture into the subfloor, and the wood around it had gone soft.
That’s the lesson running through everything I know about how to repair common wood problems around your home: the visible flaw is usually the least interesting part. A scratch is a scratch, but a soft spot, a sticking door, or a gap that keeps reopening is almost always telling you something about moisture, movement, or structure.
This guide covers the fixes I’d actually trust, in order of difficulty. You’ll learn how to diagnose what’s wrong, pick the right material, and know when to stop and call someone.
[Note to editor: this opening anecdote is a placeholder in author voice. Replace it with the author’s real experience before publishing. Search engines and readers reward verifiable first-hand detail.]
What Are the Most Common Wood Problems at Home (and Why Do They Happen)?
Wood is a natural material that never entirely stops reacting to its environment. It swells when it absorbs moisture and shrinks when it dries. It dents under impact, wears under foot traffic, and feeds fungi and insects when conditions allow.
Nearly every household wood problem traces back to one of three causes.
Moisture: the root cause behind most damage
Water is the big one. Leaks, condensation, poor drainage, high humidity, and unsealed end grain all push moisture into wood. As a rule of thumb, wood that stays above roughly 20% moisture content for long stretches becomes hospitable to decay fungi. Wood in a typical heated home sits much lower.
Moisture causes rot, warping, cupping, swollen doors, peeling finish, and the dark stains that spread around leaks. If you take only one idea from this guide, take this one: find and fix the water source before you repair the wood.
Movement, wear, and impact
Seasonal humidity swings make wood expand and contract. That’s why door gaps open in winter and doors stick in summer, why hardwood floors develop gaps between boards, and why joints in furniture loosen over time.
Then there’s plain mechanical damage: scratches, dents, gouges, cracked corners, stripped screw holes, and splintered edges. These look dramatic but are the easiest to fix.
Pests and when it’s not a DIY job
Termites, carpenter ants, and powderpost beetles damage wood from the inside. Telltale signs include tiny round exit holes, fine powder (frass) beneath the wood, mud tubes along foundations, and wood that sounds hollow when tapped. If you suspect an active infestation, call a licensed pest professional first. Repairing wood that’s still being eaten is wasted effort.
[Internal Link: “how to spot termite damage in your home”]
Why Fixing Wood Problems Early Matters
Wood damage compounds. A hairline crack in an exterior window sill lets water in. The water softens the wood. The softened wood holds more water, and eventually you’re replacing a sill and part of the framing.
Small defects become structural ones
Interior cosmetic damage is mostly cosmetic. But anything that carries load or touches water (deck posts, stair stringers, window sills, door thresholds, subfloors near plumbing) deserves attention quickly. Soft wood in those places can become a safety issue, not just an eyesore.
Repair vs. replacement costs
Repairing is usually cheaper and less disruptive, but not always. A tube of filler or a two-part epoxy repair costs a few dollars and an afternoon. Replacing a rotted trim board might cost about the same. Replacing a structural member, or paying a contractor to do it, can cost far more. As a general principle, early repair is cheap, and late repair is expensive.
I’m deliberately not quoting a statistic here. Costs vary enormously by region and by project, so be wary of any article that promises you a specific savings figure without a source.
[Internal Link: “how to inspect your home for water damage”]
How to Repair Common Wood Problems: Step by Step
I think of every wood repair as a four-part process, which I call Diagnose, Dry, Repair, Protect:
- Diagnose. What’s wrong, and why did it happen?
- Dry. Fix the cause and let the wood dry out. Skipping this step is the most common reason repairs fail.
- Repair. Use the right material for the job (glue, filler, epoxy, a patch, or replacement).
- Protect. Seal, prime, stain, or paint so the repair lasts.
Here’s how it plays out across the problems you’re most likely to meet.
Surface damage: scratches, dents, and water rings
Light scratches. If the scratch hasn’t gone through the finish, a wax filler stick or a stain marker matched to your wood color is often enough. Wipe the area clean, fill or color the scratch, then buff off the excess.
Deeper scratches and gouges. Use a color-matched wax stick, hardwood filler, or a shellac-based burn-in stick for furniture. Press the filler in, level it flush with a plastic scraper, and finish to match.
Dents. Dents often mean compressed fibers, not missing wood. You can sometimes raise them with steam: place a damp cloth over the dent and touch it briefly with a hot iron, repeating a few times. The moisture swells the crushed fibers back up. Test somewhere hidden first, since heat can damage some finishes.
White water rings. These are usually moisture trapped in the finish, not in the wood. Gentle approaches include rubbing with a soft cloth and a little non-gel toothpaste or fine abrasive paste, or using very fine (0000) steel wool with wax. Dark rings that have penetrated the wood generally need sanding and refinishing.
Tip: Test any fix on a hidden spot before you touch the visible surface.
Holes, gaps, and cracks
Choosing the right material matters more than technique here.
Small nail and screw holes. Wood filler or putty. For painted surfaces, use a paintable wood filler or spackle. For stained wood, use a color-matched putty applied after finishing, since many fillers don’t take stain the way raw wood does.
Stripped screw holes. A classic fix: dip a few toothpicks or a small wooden dowel in wood glue, push them into the hole, let the glue dry, trim flush, and re-drive the screw. For a bigger hole, glue in a dowel and re-drill. For hinges, a longer screw that reaches the framing behind the jamb often solves the problem outright.
Gaps in trim and molding. Use paintable caulk for gaps between trim and walls. Use wood filler for gaps at mitered corners that will be painted. For stained trim, color-matched putty or a thin wooden shim glued in place gives better results.
Splits and cracks. For a split along the grain, work wood glue into the crack, clamp it closed, wipe away squeeze-out, and let it cure fully. For cracks that keep reopening, such as in solid tabletops, consider a small wooden “butterfly” key or a stitched repair. Seasonal movement is natural, so some cracks will need accommodating rather than eliminating.
Splintered edges. Glue the splinter back where you can, clamp it, and sand lightly. If the piece is gone, fill with epoxy filler or exterior wood filler and reshape once cured.
Rot and soft wood
This is where most DIYers either underreact or overreact, so here’s the framework I use.
Step 1: Probe. Push a screwdriver or an awl into the wood. If it sinks in easily or the wood crumbles, it’s rotted. If it resists, you may be dealing with surface damage only.
Step 2: Find the water. A leaking gutter, failed flashing, missing caulk, a splashing downspout, or a plumbing leak. Fix that first, or the repair is temporary.
Step 3: Decide: repair or replace.
- Replace if the wood is structural, deeply rotted, or soft through most of its thickness. Think joists, posts, rafters, and sills.
- Repair if the rot is localized and non-structural, such as a window sill corner, trim, or a door bottom.
Step 4: For repairs, remove all soft wood. Dig out the rotted material with a chisel, a screwdriver, or a rotary tool until you reach firm wood. Let it dry completely. A moisture meter helps here.
Step 5: Consolidate and fill. Apply a penetrating epoxy consolidant to harden the remaining wood, then fill the void with a two-part epoxy filler according to the manufacturer’s directions. Shape it while it’s workable, then sand, prime, and paint.
Step 6: Seal everything. Prime and paint all faces, including hidden end grain, which absorbs water faster than any other surface.
Step 7: Cut out and replace small sections where practical. Sometimes the cleanest fix is a “Dutchman” patch: cut out the damaged section square, glue and fasten in a matching piece, then sand and finish.
[Internal Link: “epoxy wood repair: step-by-step tutorial”]
Squeaky floors, sticking doors, and loose joints
Squeaky floors. Squeaks come from boards rubbing against nails or against each other, usually where the subfloor has separated from the joists. If you can access the underside, drive screws or add shims and construction adhesive between the subfloor and joist. From above, you can drive trim-head screws through the floor into a joist, or sprinkle powdered graphite or talc between boards as a temporary quieting measure. Locate the joists first so you’re fastening into solid wood and not into empty space.
Sticking doors. Before you reach for a plane, check the simple stuff:
- Tighten the hinge screws. Loose hinges drop the door.
- Find the rub points by looking for shiny or worn spots along the edge or by sliding a sheet of paper around the gap.
- If the door is only swollen, sand or plane the high spots, then seal the bare wood on all edges, including the top and bottom.
Don’t plane too much. If humidity causes the sticking, a door that’s trimmed in August may develop big gaps in January.
Loose chair and furniture joints. Disassemble the joint, scrape off old glue, and reglue with a quality wood glue (traditional hide glue is excellent here because it’s reversible). Clamp it square and let it cure fully. For a joint that’s loose because the tenon has shrunk, add a thin veneer shim to the tenon before gluing.
Warped or cupped boards. Mild cupping from moisture sometimes reverses once you fix the moisture source and let the wood acclimate. Severe warping usually means replacement. Don’t try to flatten a board by forcing it with screws; it will fight you for years.
[Internal Link: “how to fix a squeaky floor from above and below”]
Common Mistakes People Make When Repairing Wood
I’ve made several of these, and a couple more than once.
Mistake 1: Repairing wood before fixing the moisture source
Filling and painting rotted wood while the leak is still running is like patching a boat while it’s still taking on water. Always solve the “why” first.
Mistake 2: Using the wrong filler
Interior wood putty on an exterior door bottom will crack and fall out. Spackle on a high-wear edge will crumble. Match the product to the environment: interior or exterior, painted or stained, structural or cosmetic.
Mistake 3: Skipping clamps
Glue needs pressure and time. A glued joint that isn’t clamped properly can be weaker than the wood itself should allow. If you don’t own clamps, you can use painter’s tape, ratchet straps, or even weighted blocks, but real clamps are worth it.
Mistake 4: Sanding too aggressively or too early
Coarse sandpaper can leave scratches that show through stain. Work through grits gradually, and always sand with the grain.
Mistake 5: Ignoring end grain
End grain acts like a bundle of tiny straws and soaks up water. When you cut or plane a door, window sill, or deck board, seal the freshly exposed end grain immediately.
Mistake 6: Forgetting safety, especially with old finishes
If your home was built before 1978, paint on wood trim, windows, and doors may contain lead. Sanding, scraping, or heat-stripping it can create hazardous dust. In the U.S., the EPA has rules covering renovation work on older homes, and testing kits are inexpensive. Wear a properly fitted respirator, use wet methods, and test before you sand.
[Internal Link: “how to test for lead paint before renovating”]
Expert Tips and Advanced Strategies
These are the things I’d tell a friend who’s already tackled a few repairs.
1. Buy a pin-type moisture meter. They cost far less than one bad repair. Checking that wood is dry before you fill, glue, or paint prevents most repair failures.
2. Color-match with test patches. Stain and finish look different on every wood species and in different lighting. Test on scrap or an inconspicuous area, let it fully dry, and judge it in daylight.
3. Fill slightly proud, then sand flush. Most fillers shrink as they cure. Apply them a touch above the surface, let them dry, and sand down. A recessed fill is much harder to hide.
4. Use the right glue for the job. Standard PVA (yellow) wood glue handles most interior repairs. Waterproof (Type II or III) glue suits exterior or damp areas. Polyurethane glue expands and fills small gaps but is messy. Epoxy bonds dissimilar materials and fills voids.
5. Grain direction matters when patching. If you cut in a replacement piece, orient the grain the same way as the surrounding wood. It’s the difference between a patch you can find from across the room and one you can’t find at all.
6. Reinforce, don’t just glue. For heavily stressed joints, such as chair rungs, add a small dowel or a hidden screw alongside the glue. Glue alone may not hold under repeated stress.
7. Document and revisit. After repairing exterior wood, check it after the first heavy rain and again after a full season. If the repair holds through the wet months, you can trust it.
Comparison Table: Choosing the Right Wood Repair Material
| Material | Best For | Strength / Durability | Sandable & Paintable | Difficulty | Approx. Cost |
|---|---|---|---|---|---|
| Wood filler (interior) | Small holes, nail holes, shallow dents | Low to moderate; not for structural use | Yes (check label for stainable types) | Easy | Low |
| Exterior wood filler | Weathered trim, window frames, door bottoms | Moderate; more moisture-resistant | Yes | Easy | Low to moderate |
| Two-part epoxy filler | Rot repair, large gaps, missing chunks | High; bonds and hardens; very durable | Yes, once fully cured | Moderate | Moderate |
| Wood glue (PVA) | Splits, loose joints, laminated repairs | High on tight-fitting joints; needs clamping | Wipe off squeeze-out first | Easy | Low |
| Wax filler sticks / putty | Scratches and nail holes on finished wood | Cosmetic only | Not paintable | Easy | Low |
| Dutchman patch (replacement section) | Localized rot, damaged edges, splits | Very high when properly fitted | Yes | Moderate to hard | Low to moderate |
My take: Use cheap filler for cosmetic work, epoxy where rot or moisture is a factor, and glue plus clamps for anything that needs to hold weight.
Real Results: A Sample Repair Weekend
Here’s an illustrative example, a composite based on common homeowner experiences and not a single measured case, showing how this approach plays out.
Imagine a homeowner with three problems on one weekend list: a rotted corner on an exterior window sill, a bedroom door that sticks every summer, and a squeaky stretch of hallway floor.
Saturday morning: the sill. They probe the sill with a screwdriver and find soft wood in the bottom corner only. The firm wood a couple of inches in confirms it’s localized. Before touching it, they check the gutter above the window and find a leak dripping onto the sill. They clear the clog and re-seal the gutter joint. Then they dig out the soft wood, let the area dry, apply consolidant, fill with epoxy, sand, prime, and paint.
Saturday afternoon: the door. Tightening the loose top hinge screws fixes most of the sticking. The remaining rub spot gets a light pass with a plane, and the exposed edge gets sealed.
Sunday: the floor. They find the joists, drive trim-head screws through the squeaky spot into a joist, and fill the screw heads with matching putty.
What this shows: None of these repairs required expensive tools. The key moves were diagnosing the cause (the gutter leak), choosing the right material (epoxy for rot, glue and screws for structure), and sealing the work. The materials for all three jobs might reasonably total well under $100, though prices vary.
[Editor: replace this with a genuine author case study with real costs, hours, photos, and before-and-after images to strengthen EEAT.]
[Internal Link: “how to maintain exterior wood trim and windows”]
Who Should DIY Wood Repair (and Who Shouldn’t)
DIY is a good fit if:
- The damage is cosmetic or localized: scratches, small holes, a sticking door, a squeaky floor
- The wood isn’t structural, or only minor non-structural parts are affected
- You can identify and fix the moisture source
- You’re comfortable with basic hand tools and patience
Call a professional if:
- Rot or damage affects structural elements such as joists, beams, load-bearing posts, or deck framing
- You see signs of active termite, carpenter ant, or beetle infestation
- There’s widespread mold or recurring moisture you can’t trace
- Your home is older and you suspect lead paint or asbestos-containing materials in the area you plan to work on
- The repair involves roofing, major plumbing, or electrical work
Honestly, I’d rather you pay a pro for one structural fix than save a few hundred dollars and risk a deck collapse or hidden damage. Good DIYers know their limits.
Conclusion: Fix the Cause, Then Fix the Wood
Here’s what I’d want you to take away. Most household wood problems aren’t mysteries. They come from moisture, movement, or wear, and each has a reliable fix if you follow the same sequence: diagnose, dry, repair, protect.
Fix the leak before you fill the rot. Choose the filler or glue that matches the job. Clamp joints properly. Seal end grain. And respect the limits of DIY when structure or safety is involved.
Start small. Pick the one nagging problem in your home, whether it’s the squeaky board, the sticking door, or the soft spot you’ve been ignoring, and fix it this weekend. You’ll learn more from one real repair than from ten articles, including this one.
Have a stubborn wood problem you can’t figure out? Describe it in the comments and I’ll help you work out where to start.
FAQ Section
1. How do I repair rotted wood without replacing it?
First, fix the moisture source and let the wood dry. Then dig out all soft, crumbly wood with a chisel or screwdriver until you reach firm material. Apply a penetrating epoxy consolidant to harden the remaining fibers, then fill the void with two-part epoxy wood filler. Once cured, sand, prime, and paint. This works well for localized, non-structural rot like window sills and trim. In my experience, epoxy repairs outlast ordinary filler by years, but they aren’t suitable for structural members, which should be replaced.
2. What is the best way to fill holes and cracks in wood?
It depends on the size and location. Use wood putty or spackle for small nail holes, wood filler for larger holes and cracks, and wood glue plus clamps for splits along the grain. For exterior or rot-prone areas, choose an exterior-rated filler or epoxy. If you plan to stain, pick a stainable filler or use color-matched putty after finishing. Always overfill slightly, since most fillers shrink as they dry, then sand flush. Test the color on a hidden spot first.
3. Why is my wooden door sticking, and how do I fix it?
Most sticking doors are caused by humidity swelling the wood or by loose hinges letting the door sag. Start by tightening the hinge screws. If it still rubs, find the contact points by looking for shiny spots or using a sheet of paper in the gap. Sand or plane only those areas, then seal the bare wood. I’d avoid heavy planing in humid seasons, since the wood will shrink again later and leave you with gaps.
4. How do I stop a hardwood floor from squeaking?
Squeaks usually come from movement between the subfloor and joists, or between boards. From below, you can add shims with construction adhesive or drive screws up through the subfloor. From above, locate a joist and drive trim-head screws through the squeaky board, then fill the holes. Powdered graphite or talc worked between boards can quiet minor squeaks temporarily. I’ve found fixing from underneath is the most reliable, if you have basement or crawlspace access.
5. When should I replace wood instead of repairing it?
Replace wood when it’s structural (joists, beams, posts, stringers), when rot extends deep into its thickness, or when the damage is widespread. Also replace when the wood stays soft after drying, or when repeated repairs fail. Repair is appropriate for localized, non-structural damage such as trim, sills, and furniture. In my opinion, when in doubt about structural wood, treat it as a replace-or-consult-a-pro situation. The cost of being wrong is too high.
6. What’s the difference between wood filler and wood putty?
Wood filler is typically a harder compound used before finishing to fill holes and cracks, and it’s designed to be sanded flush and then stained or painted (check the label for stainable types). Wood putty usually stays slightly pliable and is applied after finishing to hide nail holes, matched to the finish color. Filler is generally the better choice for raw wood repairs, and putty for touch-ups on finished surfaces. Neither is meant for structural repairs. Epoxy is a better choice for those.
7. Can I fix water-damaged wood?
Often, yes, if you catch it early. Stop the water source, dry the area thoroughly (fans and a dehumidifier help), and assess the damage. Surface staining or minor swelling may clean up with sanding and refinishing. Wood that is soft, crumbly, or moldy generally needs removal. Check for hidden mold in surrounding areas, and call a professional if you find widespread or recurring moisture. I’d always use a moisture meter before refinishing, since sealing damp wood traps problems inside.
8. How do I remove scratches from wood furniture?
For light scratches, a stain marker or a color-matched wax stick may be all you need. For deeper ones, fill with a wax filler stick or shellac-based burn-in filler, level it, and buff. If the scratch goes through the finish across a large area, you may need to refinish the whole surface. Always work with the grain and test on a hidden area first. I usually start with the gentlest option and only escalate if needed.
9. What’s the best glue for repairing wood?
For most indoor repairs, standard PVA wood glue is strong, easy to use, and cheap. For outdoor or damp areas, use a waterproof (Type II or III) wood glue or epoxy. Hide glue is great for antique furniture because it’s reversible. Polyurethane glue fills gaps but expands and can be messy. Whatever you choose, clean the surfaces, apply glue evenly, clamp firmly, and give it full cure time before stressing the joint.
10. How do I know if wood damage is from termites or just rot?
Rot typically leaves wood soft, spongy, or crumbling, often with discoloration, and it occurs where there’s moisture. Termite damage often leaves hollow-sounding wood with tunnels (galleries) inside, and you may find mud tubes, discarded wings, or small piles of frass. The two can occur together, since damp wood attracts termites. If you’re unsure, probe the wood and look inside, and when in doubt, have a licensed pest professional inspect it before you repair anything.