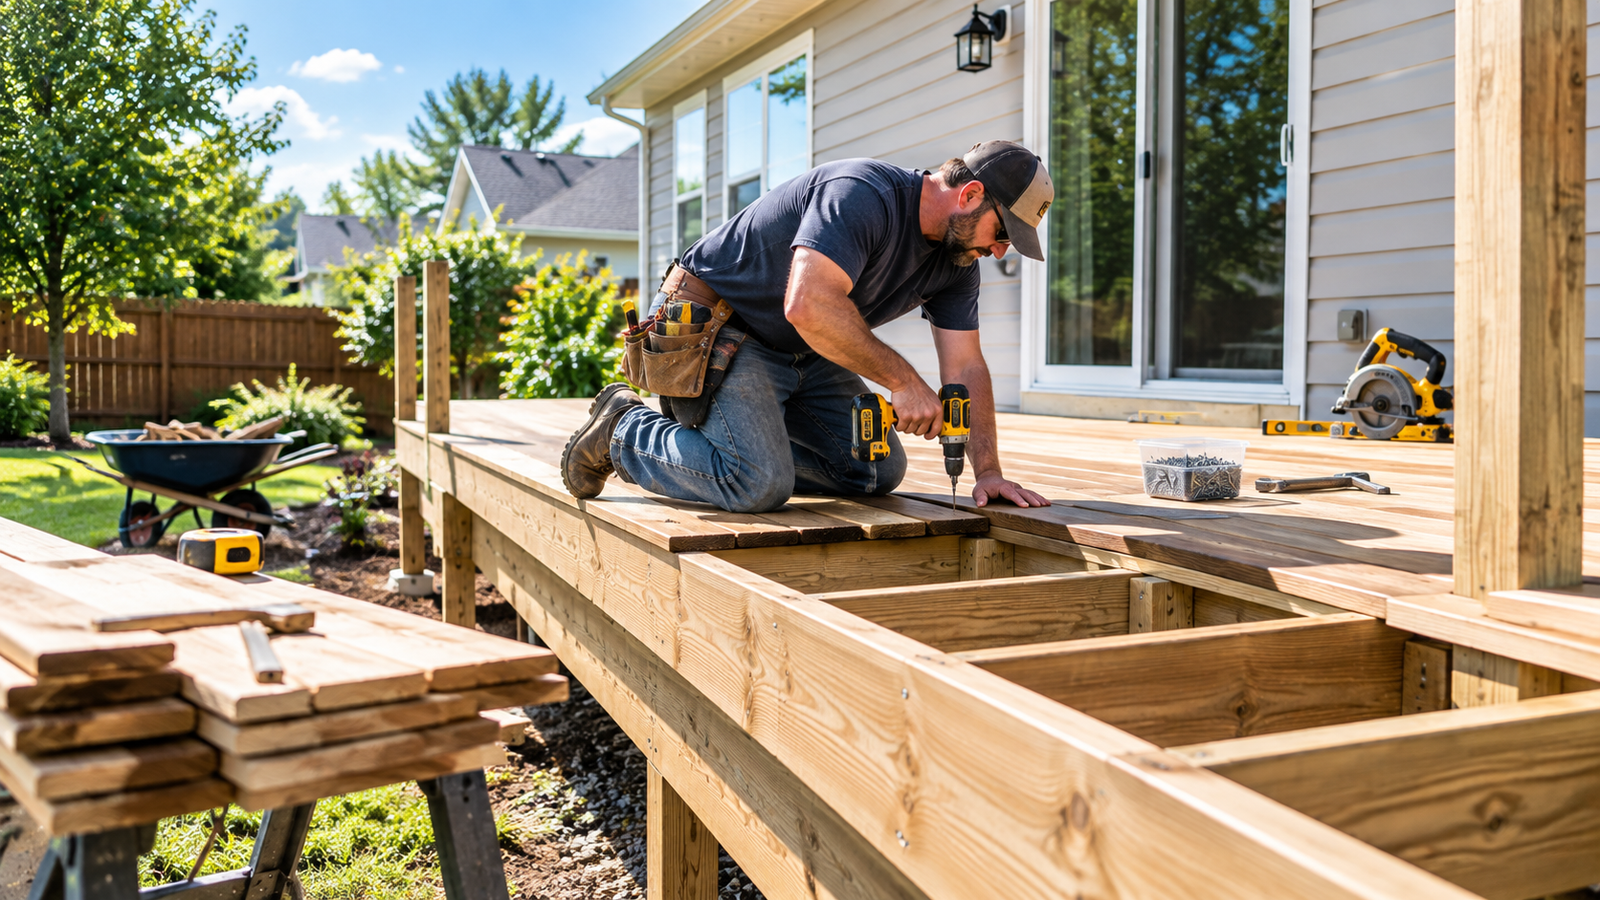
I still remember the first deck I ever helped tear out. The homeowners had paid for it eight years earlier, and the boards looked decent from above. Underneath, the joists were black and soft, the ledger had been nailed to the house, and every connection was rusting out from the inside. A deck that looked fine on the surface was about one big family barbecue from failing.
That job changed how I think about this work. The way you build a wooden deck matters far more than the lumber you buy or the stain you pick. A deck is a small structure that lives outdoors, takes on water, holds people, and gets almost no inspection once it’s finished. Most failures I’ve seen trace back to a few predictable decisions made in the first weekend.
This guide walks through those decisions the way I’d explain them to a friend with a driveway full of lumber. We’ll cover materials, footings, framing, fasteners, and the maintenance that keeps a deck standing for decades instead of years.
What Makes a Wooden Deck Strong and Durable?
Most people think “deck” means the boards they walk on. That’s the least important part. A deck is really three systems stacked together, and durability depends on all three:
- The foundation and frame: footings, posts, beams, and joists that carry the load
- The connection system: the ledger attachment, joist hangers, bolts, and screws that hold the frame together and to your house
- The surface and finish: the decking, railings, and coatings you see and touch
A strong deck needs a frame that carries loads, connections that don’t corrode or pull out, and details that shed water instead of trapping it. Water is the real enemy. Wood doesn’t rot because it’s old. It rots because it stays wet, and a durable deck is largely one that dries out quickly after every rain.
Structure vs. surface
Think of the frame as the skeleton and the decking as the skin. You can replace skin every 15 or 20 years. Replacing the skeleton means demolition. So I put most of my budget and attention into what you’ll never see once the boards go down: footings, beams, flashing, and hardware.
Wood species and treatment ratings
Your lumber choice shapes how long the deck lasts and how much work it needs. Here’s the short version:
- Pressure-treated pine (or similar softwood): the standard for framing, and widely used for decking. It’s affordable and resists rot and insects because preservative is forced deep into the wood. Where I work, this is what most structural frames are built from.
- Cedar and redwood: naturally rot-resistant, lighter, and good-looking. Softer, so they dent more, and pricier.
- Tropical hardwoods such as ipe: extremely dense and long-lived, but expensive, heavy, and hard to work. You must pre-drill every screw.
Pay attention to the use category rating on the tag. Lumber for ground contact (posts set in or near soil) needs a heavier treatment rating than lumber used above ground. Using above-ground lumber on a buried post is one of the fastest ways to shorten a deck’s life. Always read the end tag before you buy.
Why Building a Wooden Deck Properly Matters: The Real Stakes
Let’s talk about what’s actually at risk, because it’s not just aesthetics.
Safety. Deck collapses, especially when a deck pulls away from the house during a gathering, are a well-known cause of serious injuries. Safety organizations and building officials have repeatedly flagged the ledger connection and railings as top weak points. This isn’t a place for shortcuts.
Money. A deck built right costs more upfront, maybe somewhat more in lumber and hardware. A deck built wrong costs you the whole deck, plus often water damage to the house where a ledger leaked for years. I’ve seen the second repair bill dwarf the first.
Resale and insurance. Inspectors and appraisers look at decks. An unpermitted or visibly failing one can complicate a sale or an insurance claim.
Time. A well-built pressure-treated deck can reasonably last well over a decade with basic upkeep, and many last far longer. A poorly detailed one may need major repairs in half that time. The difference is almost never the brand of wood. It’s the detailing.
[Internal Link: “deck vs. patio: which is better for your yard”]
How to Build a Wooden Deck: Step-by-Step
I think of this as the “Dry, Solid, Connected” method. Every decision either keeps the structure dry, makes it solid, or makes it connected. If a choice does none of those, it’s probably decoration.
Step 1: Plan, permit, and lay out
Start on paper, not with lumber.
- Check permit rules. Most jurisdictions require a permit for attached decks and for anything above a certain height. Call your local building department before you buy anything. They’ll tell you the required footing depth, railing height, and inspection schedule.
- Call before you dig. Locate utilities. Always.
- Size the deck for use. A dining set with room to pull chairs out needs roughly 10 by 10 feet. Smaller decks feel cramped fast.
- Think about water. Where does roof runoff land? Which way does the yard slope? Don’t build a deck in a place where water pools underneath.
Sketch the deck with footing locations, beam lines, and joist direction. Mark layout with stakes and string, then square it using the 3-4-5 triangle method, or by checking that both diagonals are equal.
Step 2: Footings and posts
Footings carry the entire load into the soil, so this is where I slow down.
- Depth: Dig below your local frost line. Soil that freezes and thaws will lift shallow footings and twist your deck out of level. Your building department will give you the depth.
- Size: The footing’s job is to spread the load across enough soil. Poor or soft soil needs larger footings. Ask your building office what soil bearing value they assume, then size footings to the area each post supports.
- Material: Poured concrete is the standard. Gravel at the bottom helps drainage.
- Post connection: Don’t bury untreated wood or set a post directly in wet concrete if you can avoid it. Use a standoff post base that keeps the post end above the concrete so it can dry.
I always set a metal post base on the footing and size posts for the beam they support, not just the minimum. And I never notch a post to hold a beam. Notching removes the wood that carries the load. Bolt the beam to the post, or sit it on top with a proper cap connector.
Step 3: Beams
Beams collect load from the joists and transfer it to posts. For most residential decks, doubled lumber (such as two 2x10s or 2x12s) bolted together is typical, but the right size depends on span and load. Use span tables from your local code or the American Wood Council’s deck guidance rather than guessing.
Crown the lumber (the slight upward curve) up, keep seams tight, and fasten per the code or span table you’re following.
Step 4: The ledger board (the make-or-break connection)
If your deck attaches to your house, this is the most critical connection you’ll make.
Here’s what I insist on:
- Never rely on nails. Use through-bolts, lag screws, or structural screws made for ledgers, installed in a staggered pattern per code.
- Flash it properly. Water that runs behind a ledger rots the house’s rim joist invisibly. Install flashing that sheds water outward, and seal around fasteners.
- Attach to solid framing. Connect to the house’s structural rim, not to brick veneer, siding alone, or an overhanging floor section.
- Consider a freestanding deck. If your house wall is tricky, a freestanding deck with its own posts and beams avoids the ledger entirely. Honestly, I recommend this more often than people expect.
This is the point at which I’d call a professional if anything about your house’s framing is unclear. Ledger failures are the classic catastrophic deck failure.
[Internal Link: “how to flash a deck ledger board”]
Step 5: Joists
Joists run perpendicular to the beam and support the decking.
- Spacing: 16 inches on center is the common standard for wood decking. Some composite and diagonal-pattern decking require 12 inches. Always follow the decking manufacturer’s rules.
- Hangers: Use joist hangers rated for exterior and treated lumber, and fill every nail hole with the specified fastener. A hanger with the wrong nails is barely a hanger.
- Blocking and bridging: Add blocking where needed to stiffen the frame.
- Protect the tops. Joist tops catch water and are the first place rot starts. Self-adhesive joist tape is cheap insurance, and I apply it to the top of every joist and beam.
Step 6: Decking
Now comes the part everyone looks at.
- Gap the boards. Leave a small gap (roughly an eighth of an inch is common for dry lumber, but pressure-treated boards that are wet will shrink, so follow your lumber guidance). Gaps let water drain and air circulate.
- Fasten correctly. Use two screws per board at every joist, and use decking-rated or structural screws that match your lumber treatment. Pre-drill near ends and with hardwoods to prevent splitting.
- Mind the board ends. Seal cut ends, because end grain soaks up water like a straw.
- Hide your butt joints over a joist, and stagger them.
Step 7: Railings and stairs
Codes here exist for good reasons.
- Railings are generally required when a deck is more than 30 inches above grade. Typical residential guard height is 36 inches, and balusters must be spaced so a 4-inch sphere can’t pass through.
- Posts must be anchored into the frame, not just screwed to the deck boards. A railing post that only attaches to decking will wobble within a season.
- Stairs need consistent riser heights and adequate tread depth. Uneven risers cause falls.
Check your local code for exact numbers, and have your inspector review the plan.
Common Mistakes People Make (and How to Avoid Them)
I’ve made some of these myself, and I’ve repaired plenty more.
Water management mistakes
- Skipping flashing. The most expensive mistake of all, because the damage is hidden in your house.
- Laying decking too close to the ground. Leave enough clearance so air can move underneath.
- Letting leaves and debris sit. Trapped debris holds moisture against wood. Sweep gaps regularly.
- No joist protection. Bare joist tops soak up water at every screw hole.
Hardware and fastener mistakes
- Using the wrong fasteners. Modern pressure-treated lumber contains copper-based preservatives that corrode ordinary bright steel quickly. Use hot-dip galvanized or stainless steel hardware rated for treated wood.
- Under-fastening hangers. Every hole in a joist hanger is there for a reason.
- Mixing metals. Different metals can accelerate corrosion. Keep hardware types consistent.
- Overdriving screws. Crushed wood fibers around a screw head hold water and rot.
Planning mistakes
- Skipping the permit and inspection, then being forced to rework or tear out
- Under-sizing footings in soft soil
- Building too big for the budget, then cheaping out on the parts you can’t see
My honest rule: if you have to cut a corner, cut it in the decoration, never in the frame.
Expert Tips and Advanced Strategies
These are things I’d tell a close colleague.
- Buy the best frame lumber you can afford, then decide on decking separately. Frame durability drives lifespan. You can upgrade surface boards later.
- Let wet treated lumber dry before sealing or staining. Many treated boards arrive saturated. Sealing too soon traps moisture. Do a simple water-drop test: if drops soak in, it’s ready to finish.
- Seal every cut and drilled hole. Cutting breaks through the treated shell. A brush-on preservative on cut ends is quick and effective.
- Use tape on everything horizontal. Joists, beams, and the top of any ledger-adjacent framing.
- Design for airflow. Skirting that blocks ventilation can trap moisture. If you want a closed look, use vented lattice or leave gaps.
- Pre-plan for lighting and wiring. Run conduit before the decking goes down, not after.
- Create a maintenance calendar. Clean once or twice a year, inspect fasteners and the ledger flashing annually, and reseal on the schedule your product recommends. Five minutes of looking beats five days of repair.
[Internal Link: “how to clean and seal a wooden deck”]
4. Comparison Table: Deck Material Options
| Feature | Pressure-Treated Pine | Cedar / Redwood | Tropical Hardwood (Ipe) | Composite Decking |
|---|---|---|---|---|
| Typical lifespan (with care) | Roughly 10–20 years | Roughly 15–25 years | Often 25+ years | Often 25+ years (varies by brand) |
| Rot resistance | Good (from treatment) | Good (natural) | Excellent | Excellent (won’t rot, but substructure still can) |
| Upfront cost | Lowest | Moderate–high | High | High |
| Maintenance | Seal/stain regularly | Seal/stain regularly | Oil periodically, or let it gray | Occasional cleaning |
| Workability (DIY) | Easy | Easy | Hard (dense, pre-drill) | Moderate (follow system rules) |
| Looks | Plain, takes stain well | Rich, warm | Premium | Uniform, many styles |
| Best for | Budget builds, frames | Appearance-focused decks | Long-term premium builds | Low-maintenance priority |
| Difficulty/Price | Easy / $ | Moderate / $$ | Hard / $$$$ | Moderate / $$$ |
Lifespans are rough ranges and depend heavily on climate, drainage, and upkeep. Note that even with composite or hardwood surfaces, most frames are still pressure-treated wood, so the frame guidance above applies regardless.
Real Results & Case Studies
(Illustrative composite. Replace with your own documented project for EEAT.)
Picture a typical 12-by-16-foot attached deck replacement, the kind I see constantly. The old deck had a nailed ledger, no flashing, bare joists, and footings only a foot deep. It lasted about nine years before the owner noticed soft boards near the house wall.
The rebuild followed the “Dry, Solid, Connected” method: footings below frost depth with standoff post bases, a through-bolted and flashed ledger, tape on every joist and beam, hot-dip galvanized hardware, and decking with proper gaps and sealed ends. Cost rose modestly compared with a basic rebuild, mostly in hardware, flashing, and tape.
The real payoff showed up at the first inspection and again after a few wet seasons: no movement, no soft spots, no staining along the house wall. The most telling lesson is that nothing about this approach was exotic. It was simply doing the boring, hidden parts correctly.
Who Should Build This Themselves (and Who Shouldn’t)
This is a good DIY project if:
- You’re comfortable with a level, a circular saw, and a drill
- The deck is low, simple, and ideally freestanding
- You’re willing to pull permits and schedule inspections
- You have a helper for lifting beams and squaring layout
Consider hiring a pro if:
- The deck is high off the ground, multi-level, or has a complicated roofline
- Your house framing, siding, or foundation makes the ledger attachment unclear
- Your soil is poor, sloped, or has drainage problems
- You’d be tempted to skip permits to save time
There’s no shame in hiring out the structural parts and finishing the decking and railings yourself. That hybrid approach is one of my favorites.
Conclusion
When I look back at every deck I’ve seen fail, the cause was almost never the boards on top. It was water getting where it shouldn’t, connections that weren’t up to the job, and footings that couldn’t hold their ground. Fix those three things and you’ll build a wooden deck that your family can use for decades instead of one you’ll be replacing in a decade.
My takeaways: plan and permit first, set footings below frost depth, make the ledger connection bulletproof (or go freestanding), protect every horizontal surface from water, and use fasteners made for treated lumber. Then maintain it a little each year.
Ready to start? Sketch your layout this week, call your local building department, and write down your questions before you buy a single board. And if you’ve built a deck, I’d love to hear what you learned the hard way. Leave a comment below.
[Internal Link: “deck permit checklist and inspection guide”]
5. FAQ Section
1. How long does a wooden deck last?
It depends on the wood, the climate, and how well the deck is detailed and maintained. A properly built pressure-treated deck commonly lasts a decade or two, cedar can last longer, and dense hardwoods often last longest. In my experience, drainage and flashing matter more than species. A cheap deck that stays dry beats an expensive one that stays wet.
2. What is the best wood for a durable deck?
For the frame, pressure-treated lumber with the correct use rating is the practical standard. For the surface, cedar, redwood, and tropical hardwoods like ipe all perform well, while pressure-treated pine is the budget choice. I use treated lumber for framing nearly every time, then choose decking based on budget and how much maintenance the owner will tolerate.
3. How far apart should deck joists be?
Sixteen inches on center is the most common spacing for standard wood decking. Diagonal decking patterns and some composite products need closer spacing, often 12 inches. Always follow the decking manufacturer’s instructions and your local code, since joist size, species, and span all affect the correct spacing.
4. Do I need a permit to build a deck?
In most places, yes, especially for attached decks or those above a certain height. Rules vary by city and county, so call your building department before buying materials. In my experience, the permit process is worth it. Inspectors catch footing and ledger problems when they’re still cheap to fix.
5. How deep should deck footings be?
Footings should extend below your local frost line so freezing soil can’t lift them. That depth varies widely by region, and in warm climates it may be shallow, while cold regions require much deeper holes. Your building department can give you the exact number and the footing size they require for your soil.
6. Should I attach a deck to my house or build it freestanding?
Attaching saves posts and can feel more solid, but it makes the ledger connection and flashing critical. Freestanding avoids that risk and protects the house wall from water damage. Honestly, if your house framing is complicated or you’re a first-time builder, I lean toward freestanding.
7. What screws and fasteners should I use on pressure-treated wood?
Use hot-dip galvanized or stainless steel fasteners and connectors rated for treated lumber. Modern preservatives can corrode ordinary steel quickly, and failed hardware is a hidden structural problem. Check that your joist hangers, screws, and bolts all specify compatibility with treated wood.
8. Can I build a deck directly on the ground?
It’s possible for a very low, ground-level platform, but it’s not ideal. Wood in contact with soil stays wet and rots faster. If you do it, use ground-contact-rated lumber, a gravel base, and plenty of drainage. Elevated decks on proper footings with airflow underneath last noticeably longer in my experience.
9. When should I seal or stain a new wooden deck?
Wait until the wood has dried enough to absorb finish, which can take weeks to months for wet pressure-treated lumber. A simple test is sprinkling water on the boards. If it beads up, wait. If it soaks in, you can seal. Then re-coat on the schedule the product recommends.
10. How much weight can a wooden deck hold?
Residential decks are generally designed for a specified live load plus the deck’s own weight, set by building code. Capacity depends on joist size, spacing, span, beam size, and footings. If you plan to add a hot tub, heavy planters, or large gatherings, have the design checked by a professional, because those loads often need extra framing.